Ever pulled a freshly extruded aluminum profile off the line only to find it curved, twisted, or bowed? You're not alone. Before you can learn how to straighten aluminum extrusion effectively, you need to understand why it warped in the first place. Knowing the root cause directly informs the correct fix and helps prevent the problem from recurring.
Warping occurs when the material distorts due to uneven cooling or internal stresses during the extrusion process. In aluminum profiles, this distortion typically shows up as bow, twist, or sweep after the metal cools. The good news? Once you understand what's happening at the material level, choosing the right correction method becomes much simpler.
Imagine a hot aluminum profile leaving the die and traveling down the runout table. Different parts of that profile cool at different rates. Thicker sections hold heat longer than thin walls. The side facing the cooling fans chills faster than the side resting on the table. These temperature differences create internal stress gradients within the metal.
When one area of the profile shrinks faster than another, the material pulls unevenly. This differential shrinkage causes the profile to bend or distort. The result? A profile that looked perfectly straight at the die exit now shows a noticeable curve or twist once it reaches room temperature.
Quench rate differentials across the profile cross-section are the primary culprit. Water quenching, air cooling, or a combination of both must be applied uniformly. If one flange gets hit with more cooling than the opposite side, the faster-cooling section contracts first and pulls the profile toward it. This manifests as bow in a single plane or, in more complex cases, as twist or sweep.
Die design also plays a critical role. A poorly balanced die creates uneven metal flow during extrusion. If aluminum exits the die faster on one side than the other, the profile develops internal stresses before cooling even begins. These stresses compound during the quench phase, making distortion worse.
Not all aluminum alloys behave the same way during and after extrusion. The alloy composition and temper designation significantly influence how prone a profile is to warping and how difficult it will be to straighten.
6063 aluminum, commonly used in architectural applications like window frames and door frames, has a lower yield strength compared to 6061. This makes 6063 profiles more prone to bow during cooling. The softer material deforms more easily under internal stress gradients. However, this same characteristic means 6063 is generally easier to correct once distorted.
6061 aluminum, often called structural aluminum, holds its shape better during the extrusion and cooling process due to its higher yield strength and fatigue strength. But here's the trade-off: once a 6061 profile does warp, it's significantly harder to straighten without risking cracks. The higher strength that helps it resist initial distortion also makes it less forgiving during correction attempts.
Temper matters too. A profile in T4 condition (solution heat-treated but not artificially aged) is softer and more workable than the same profile in T6 condition (fully aged). Attempting to straighten a fully aged T6 profile carries a much higher cracking risk than working with material in a softer temper state.
Understanding aluminum extrusion straightness starts with recognizing these four main root causes:
Think of this section as the "why before the how." Readers who understand these root causes are better equipped to choose the right straightening method for their specific situation. More importantly, they can work with their extrusion supplier to address the source of the problem rather than repeatedly correcting symptoms.
So you've got a warped aluminum profile. Now what? Before grabbing a press or firing up a heat gun, you need to identify exactly what kind of distortion you're dealing with. This diagnostic step is critical because each distortion type requires a different correction approach. Misdiagnose the problem, and you'll waste time, effort, or worse, make the deformation even more severe.
Think of it like a doctor diagnosing a patient. You wouldn't prescribe medication without first understanding the symptoms. The same logic applies here. How straight are aluminum extrusions supposed to be? And what happens when they're not? Let's break down the four main distortion types so you can pinpoint your problem accurately.
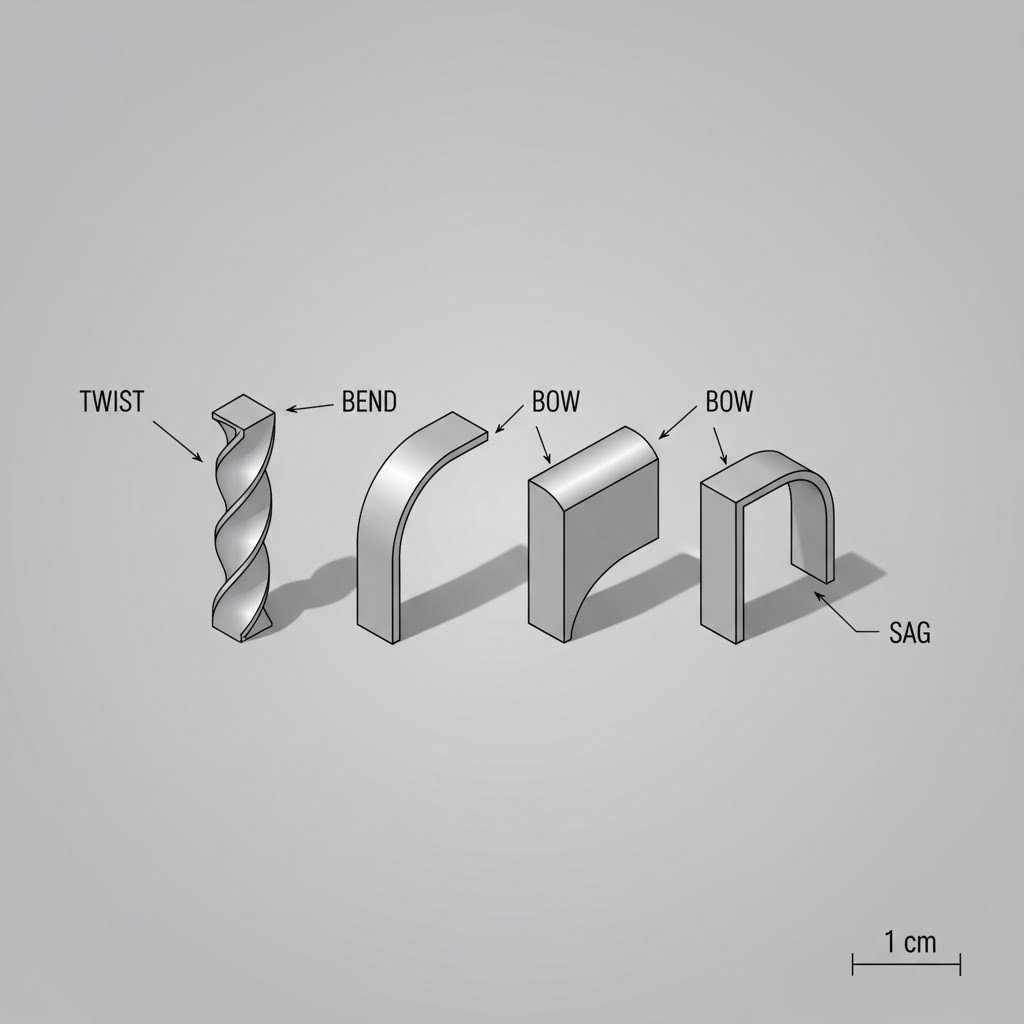
Aluminum profiles can distort in several distinct ways, and each one looks different and behaves differently during correction. Here's what you need to know:
Bow is the most common distortion type. Imagine laying your profile on a flat surface and seeing a curve in one plane along its length, like a gentle arc. The profile curves either upward or downward when viewed from the side. Bow typically results from uneven quench rates during cooling, where one face of the profile cools faster than the opposite face.
Camber refers to a curve in the horizontal plane. When you look down the length of the profile from one end, you'll see it curving left or right rather than staying straight. In metal bending terminology, camber denotes a curve about the strong axis of the member. This often occurs when die design creates uneven metal flow across the profile width.
Twist involves rotation along the longitudinal axis. Picture holding one end of the profile fixed while the other end rotates slightly, like wringing out a towel. Twist is particularly problematic because it affects the profile's ability to mate with other components. It commonly results from asymmetric cooling or handling issues on the runout table.
Sweep is a compound curve that combines elements of bow and camber. The profile curves in multiple planes simultaneously, creating a more complex deformation pattern. Sweep is often the hardest to correct because you're dealing with distortion in more than one direction at once.
| Distortion Type | Visual Description | Common Cause | Recommended Method |
|---|---|---|---|
| Bow | Curve in vertical plane along length | Uneven quench rates top-to-bottom | Stretch, press, or roller straightening |
| Camber | Curve in horizontal plane (left/right) | Uneven die flow or side-to-side cooling | Press straightening or stretch |
| Twist | Rotation along longitudinal axis | Asymmetric cooling or improper handling | Stretch straightening preferred |
| Sweep | Compound curve in multiple planes | Multiple combined causes | Stretch straightening or staged correction |
Knowing the distortion type is only half the equation. You also need to quantify how severe it is. This measurement determines whether straightening is feasible or whether replacement makes more sense.
For measuring bow, place the profile on a precision surface plate or lay a straightedge along its length. Use a feeler gauge to measure the largest gap between the profile and the reference surface. This gap represents your total bow. To calculate deviation per unit length, simply divide the maximum gap by the profile length. For example, a 4-meter profile with a 2.0 mm maximum bow has a straightness deviation of 0.5 mm per meter.
For twist measurement, a dial indicator works well. Secure one end of the profile and measure the rotational deviation at the opposite end. You can also use feeler gauges at multiple points along the length to map how the twist progresses.
What's the acceptable aluminum extrusion straightness tolerance? Industry standards typically allow 0.5 mm per meter for standard profiles. Precision applications may require tighter tolerances of 0.3 mm per meter or less, while less critical uses might accept up to 1.0 mm per meter. Profiles between 1-2 meters generally hold to ± 0.3 to 0.5 mm per meter, while those over 4 meters may allow ± 0.7 to 1.0 mm per meter.
Here's a practical rule: if your measured distortion exceeds two to three times the standard tolerance, carefully evaluate whether correction is worth the effort. Severe distortion often requires multiple correction cycles, which increases work hardening and cracking risk. Sometimes ordering a replacement profile is the smarter call.
With your distortion type identified and magnitude measured, you're now ready to select the right straightening method for your specific situation.
You've identified the distortion type and measured its severity. Now comes the critical decision: which correction method should you use? This choice can mean the difference between a perfectly straight edge aluminum extrusion profile and a cracked, scrapped piece of material. The wrong approach wastes time, damages profiles, and costs money.
Four main straightening methods exist, each suited to different situations, scales, and material conditions. Understanding when to use each one is the key to successful correction. Let's map out your options so you can make an informed decision before picking up any tools.
Each straightening technique works through a different mechanism and comes with its own set of trade-offs. The table below gives you a quick reference for matching your situation to the right approach.
| Method | Best For (Distortion Type) | Scale | Alloy Temper Suitability | Equipment Required | Risk Level |
|---|---|---|---|---|---|
| Stretch Straightening | Bow, twist, and sweep simultaneously | Industrial extrusion lines | Best for T4, T1, or freshly extruded (W temper); higher risk on T6 | Hydraulic stretcher with gripping jaws | Low to moderate when done correctly |
| Press Straightening | Localized bow and camber | Shop or fabrication facility | Good for 6063-T5; proceed cautiously with 6061-T6 | Hydraulic or arbor press, V-blocks, protective pads | Moderate; requires careful incremental force |
| Roller Straightening | Bow in a single plane on simple profiles | Shop or production line | Works well on softer tempers; less effective on T6 | Roller straightening machine with offset rollers | Low for bow; ineffective for twist |
| Heat Straightening | Localized bow or twist in field conditions | Field repair or small shop | Best for 6063-T5; reduces temper in T6 profiles | Heat gun or propane torch, protective gloves | Moderate to high; temper loss if overheated |
Stretch straightening is the industrial standard used on extrusion lines. It applies controlled tensile force to the entire profile, pulling it beyond its yield point to create permanent elongation. This method corrects bow, twist, and sweep in a single operation. The catch? It requires specialized equipment and works best on freshly extruded profiles that haven't yet reached full T6 hardness.
Press straightening is the go-to method for fabricators and small shops working with already-cut profiles. You support the profile at two points and apply force at the apex of the bow. It's effective for localized corrections but requires patience and careful measurement between each press cycle.
Roller straightening passes the profile through a series of alternating offset rollers that repeatedly flex the material through its yield point. It works well for continuous bow correction on simple cross-sections but struggles with twist and can leave surface marks on soft alloys.
Heat straightening uses localized heating to temporarily reduce yield strength in a targeted zone, allowing repositioning with minimal force. It's often the only viable option for field repairs where machinery isn't available. However, applying heat to T6-tempered profiles permanently reduces mechanical properties in the heated zone.
Selecting the correct approach depends on three factors: your profile's temper, the type of distortion you're correcting, and the equipment available to you.
If your profile is T6 temper, proceed with extra caution. The T6 heat treatment creates a harder, stronger material by forming fine precipitates within the aluminum matrix. This increased strength also means reduced ductility. Heat straightening on T6 profiles will cause localized over-aging, permanently softening the heated zone. Press straightening on 6061-T6 has a narrow window between successful correction and cracking. If you must straighten T6 material, stretch straightening (when available) or very careful press straightening with small increments offers the best chance of success.
If your distortion is twist, roller straightening is largely ineffective. Rollers work by flexing the profile in a single plane, which doesn't address rotational deformation. Stretch straightening handles twist well because the tensile force acts uniformly across the entire cross-section. For shop-level twist correction without a stretcher, heat straightening applied to the convex face of the twisted zone is often your best option.
If you're working in the field without machinery, heat straightening becomes the practical choice by default. You won't have access to a stretcher or press, but a heat gun or propane torch can provide enough localized softening to allow manual correction. Just remember that this approach works best on 6063-T5 profiles. Using heat on structural 6061-T6 components should only be done when the temper loss is acceptable for the application.
If you're dealing with 6063-T5 versus 6061-T6, the difference in behavior is significant. 6063-T5 responds well to press straightening and tolerates heat correction with less risk. Its lower yield strength (around 145 MPa compared to 276 MPa for 6061-T6) means it deforms more easily under corrective force. 6061-T6, with its higher strength and reduced ductility, demands smaller correction increments and carries a higher cracking risk with each attempt.
Choosing the wrong method for your temper and distortion type is the most common reason straightening attempts fail or cause cracking.
The physics of straightening are straightforward: you're pushing the material beyond its yield strength but below its tensile strength to create permanent plastic deformation. The challenge lies in accounting for elastic spring-back, avoiding work hardening from repeated cycles, and matching your technique to the material's current condition.
With your method selected, you're ready to move into execution. The following sections walk through each technique step by step, starting with stretch straightening for industrial applications.
If you've ever watched an extrusion line in action, you've probably noticed profiles moving from the runout table to a stretcher before heading to the saw. This isn't just a handling step. It's the aluminum extrusion stretch straightening process that transforms a potentially warped profile into one that meets tolerance specs. Stretch straightening is the industrial standard for a reason: it corrects bow, twist, and sweep in a single operation.
But how does pulling on a piece of metal actually make it straighter? And what happens if you get the settings wrong? Let's break down the mechanics and walk through how to operate a straightener machine to straighten aluminum extrusions effectively.
The principle behind stretch straightening is elegantly simple. When you apply controlled tensile force to an aluminum profile, you're pulling the material beyond its yield point. This causes permanent plastic deformation, essentially elongating the profile uniformly across its entire cross-section. Any bow, twist, or sweep gets pulled out as the material stretches.
Here's what happens during the process: the profile is gripped at both ends by hydraulic jaws. These jaws clamp firmly onto the profile ends, creating a secure hold that won't slip under tension. The stretcher then applies force incrementally, typically achieving 1-3% elongation. Once the target stretch is reached, the tension is released, and the profile is measured for straightness.
Why does this work so well? Because the tensile force acts uniformly across the entire profile length and cross-section. Unlike press straightening, which applies localized force at specific points, stretch straightening addresses the whole profile at once. This makes it particularly effective for twist correction, where rotational deformation gets pulled out as the material elongates uniformly.
Timing matters significantly in this process. Stretch straightening is most effective immediately after extrusion, while the profile is still in a relatively soft T4 or T1 temper condition. At this stage, the aluminum hasn't yet undergone artificial aging, so it retains more ductility. The material yields more easily under tension and accepts permanent deformation without cracking.
Attempting stretch straightening on fully aged T6 material is a different story. The aging process creates fine precipitates within the aluminum matrix that increase strength but reduce ductility. Pulling T6 material to the same elongation percentage that works perfectly on T4 can result in cracking, especially at stress concentration points like sharp corners or thin walls. If you must stretch T6 profiles, reduce the elongation target and monitor closely for any signs of material failure.
Modern extrusion stretch straightening machines feature CNC control with force and position modes for high accuracy and repeatability. Some systems offer up to eight independently controlled axes and multiple die tables for handling long profiles. This level of control allows operators to fine-tune the process for different alloys, tempers, and profile geometries.
Ready to run the stretcher? Follow this sequence to operate a straightener machine to straighten aluminum extrusions safely and effectively:
One behavior you'll notice immediately is spring-back. When you release the tension, the aluminum elastically recovers a portion of the applied correction. The profile won't stay exactly where you stretched it. This is normal and expected. Experienced operators account for spring-back by slightly over-stretching, knowing the material will bounce back partway. The exact amount of spring-back depends on the alloy, temper, and profile geometry, so you'll develop a feel for it with experience.
A practical tip: keep records of your stretching parameters for each profile type. Note the alloy, temper, elongation percentage, and resulting straightness. Over time, this data helps you dial in the process faster and reduces trial-and-error on repeat jobs.
For fabricators and small shops without access to industrial stretching equipment, the next section covers press and roller straightening methods that achieve similar results on a smaller scale.
What if you don't have access to an industrial stretcher? Maybe you're a fabricator working with already-cut profiles, or you run a small shop where a hydraulic stretching machine isn't in the budget. Good news: press straightening and roller straightening are practical aluminum extrusion bow correction methods that deliver solid results without industrial-scale equipment.
These two techniques are the workhorses of shop-level correction. They're accessible, effective for the right applications, and let you straighten aluminum extrusion without heat when thermal methods aren't appropriate. Let's walk through how each one works and when to use them.
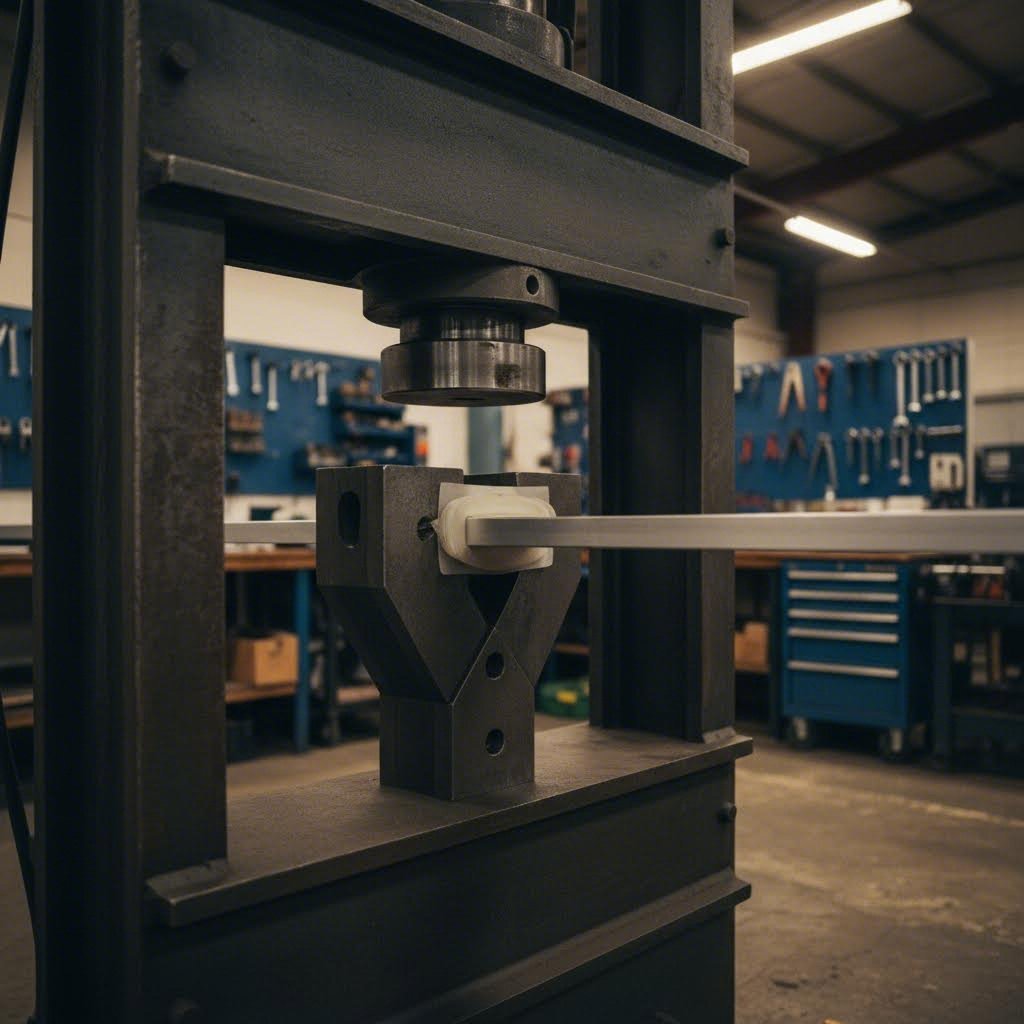
Press straightening is exactly what it sounds like: you use a press to push the bow out of a profile. The setup is straightforward. Support the profile at two points using V-blocks or padded supports, then apply downward force at the apex of the bow. The profile flexes past its yield point, and when you release the pressure, it stays closer to straight.
Sounds simple, right? It is, but the details matter. Here's how to set up and execute press straightening correctly:
The alloy and temper you're working with significantly affect how this goes. 6063-T5 responds well to press straightening because its lower yield strength allows the material to deform plastically without excessive force. You have a reasonable working window between correction and cracking.
6061-T6 is a different animal. The higher strength and reduced ductility mean you're working with a much narrower margin. Push too hard, and the profile cracks. Push too little, and spring-back erases your correction. If you're press straightening 6061-T6, use smaller force increments and check more frequently. Accept that you may need more cycles to reach your target.
When you're dealing with long profiles or need to process higher volumes, roller straightening becomes attractive. This method passes the profile through a series of alternating offset rollers that repeatedly flex the material through its yield point. Each pass removes a bit more bow until the profile emerges straight.
How does it work mechanically? The rollers are arranged in a staggered pattern, with upper and lower rollers offset from each other. As the profile travels through, it bends slightly around each roller, first one direction, then the other. This repeated flexing induces plastic deformation that gradually straightens the profile.
The roller correction process follows a specific sequence when multiple defects exist. Industry practice addresses defects in this order: flatness first, then angle, by opening expansion, closing, and finally longitudinal bending. This sequence prevents earlier corrections from being undone by later ones.
Roller straightening shines in certain situations. It handles bow in a single plane efficiently, especially on simple cross-sections. It's faster than press straightening for long profiles because the correction happens continuously as the material feeds through. And modern machines with computer controls can adjust roller positions automatically for consistent results.
But roller straightening has real limitations. It struggles with twist because the rollers only flex the profile in one plane. Rotational deformation requires a different approach. It can also leave surface marks on soft alloys like 6063, particularly if roller pressure is set too high or the rollers themselves have surface imperfections.
Which method should you choose? If you're correcting localized bow on a few cut profiles, press straightening gives you the control you need. If you're running longer profiles through production or dealing with consistent bow across many pieces, roller straightening offers efficiency. And if your distortion includes twist, neither method alone will solve the problem — you'll need to consider stretch straightening or heat-based correction.
Speaking of heat, the next section covers heat straightening for situations where mechanical methods aren't practical or available.
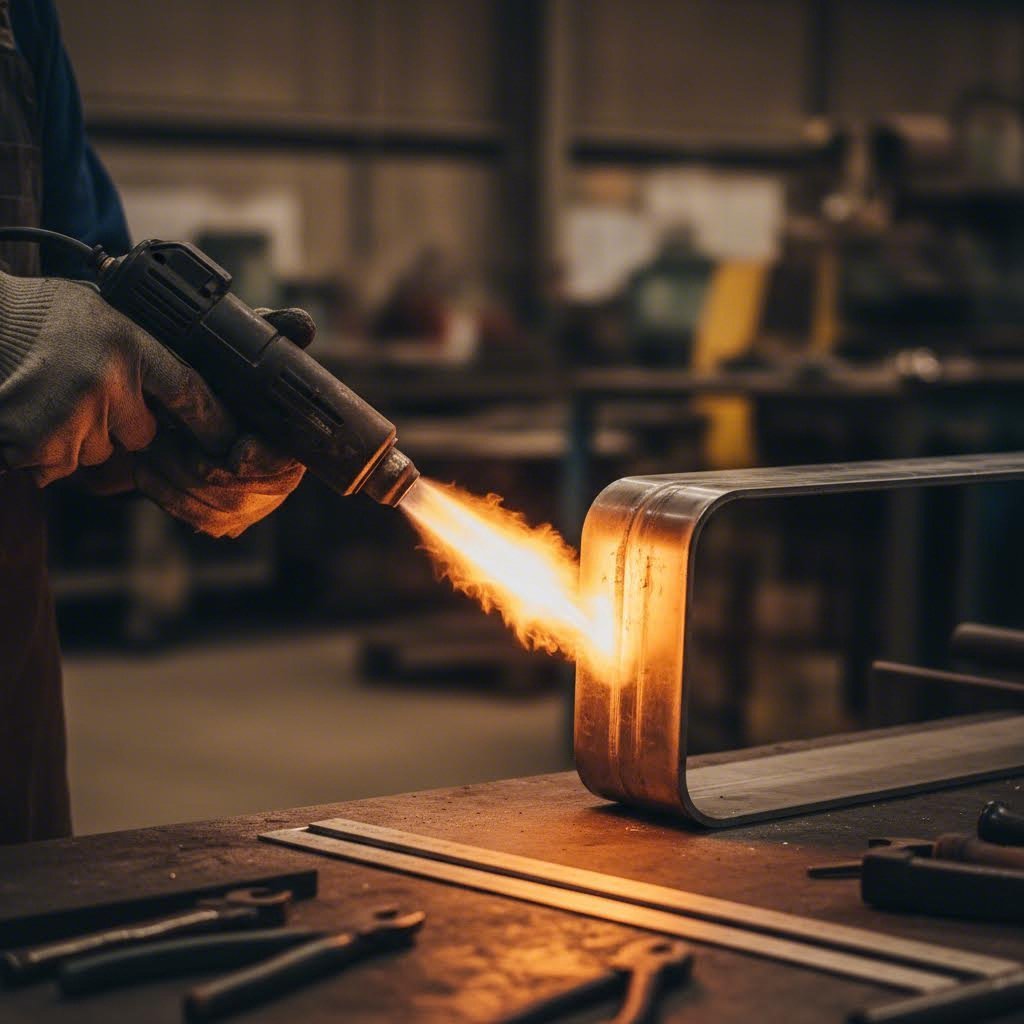
You're on a job site, miles from your shop, and the aluminum profile you need to install has a noticeable bow. No press. No stretcher. Just you, the warped profile, and a deadline. Sound familiar? This is exactly where heat straightening aluminum extrusion becomes your best friend.
Heat-based correction is a legitimate, widely used field repair method that works when mechanical straightening isn't an option. Whether you're a contractor dealing with damaged trim, a fabricator fixing a handling mishap, or a maintenance tech correcting a bent frame member, understanding how to straighten aluminum extrusion with heat gun or torch technique can save the day.
The principle behind aluminum extrusion heat correction field repair is straightforward: localized heating temporarily reduces the yield strength in a targeted zone. When you warm a specific area of the profile, that section becomes softer and more pliable. You can then reposition the material with minimal force. As the heated zone cools, it retains the corrected shape.
Here's the key distinction: this is not annealing. Full annealing involves heating the entire piece to 300-410°C and holding it at temperature to achieve complete stress relief and softening. Heat straightening targets only the bend zone, using lower temperatures for shorter durations. The goal is controlled, localized softening, not full metallurgical transformation.
Why does this work? Aluminum's yield strength drops significantly as temperature rises. At room temperature, 6063-T5 has a yield strength around 145 MPa. Warm that same material to 150-180°C, and the yield strength drops enough that gentle hand pressure can induce permanent deformation. When the material cools, it regains most of its original strength while holding the new shape.
The alloy and temper you're working with dramatically affect how well this technique works and what trade-offs you'll face.
6063-T5 profiles respond best to heat straightening. This alloy-temper combination is common in architectural applications like window frames, door frames, and decorative trim. The T5 temper indicates the material was cooled from extrusion temperature and artificially aged, but it remains relatively forgiving. You can apply moderate heat, correct the distortion, and end up with a profile that's functionally sound.
T6-tempered profiles (6061-T6 or 6063-T6) are a different story. The T6 condition results from solution heat treatment by artificial aging, which creates fine precipitates within the aluminum matrix. These precipitates are what give T6 material its higher strength. When you apply heat to a T6 profile, you cause localized over-aging, which permanently reduces mechanical properties in the heated zone. The material softens and won't return to full T6 strength even after cooling.
Is this acceptable? It depends on your application. For cosmetic trim, non-structural framing, or components where the heated zone won't see significant load, the temper loss may be perfectly fine. For structural members or fatigue-critical applications, you need to understand that the heated zone will be weaker than the surrounding material. In some cases, replacement is the better call.
Ready to straighten a bent aluminum profile with heat? Follow this sequence for the best results:
Never heat aluminum to the point of discoloration. Overheating causes irreversible temper loss and can make the profile brittle in the heated zone.
A few practical tips from the field: work in a well-ventilated area, especially if the profile has any coatings or finishes that might off-gas when heated. Wear heat-resistant gloves because the profile will stay hot longer than you expect. And always have a straightedge or reference surface nearby so you can check your progress without guessing.
What about equipment choices? A standard heat gun (the kind used for paint stripping or shrink wrap) works well for thin-walled profiles and gentle corrections. For thicker sections or more stubborn distortion, a propane torch delivers more concentrated heat faster. Just keep the flame moving to avoid localized overheating.
Heat straightening won't solve every problem. Severe distortion, T6 profiles in structural applications, or situations where surface finish is critical may still require mechanical methods or replacement. But for field repairs, small shop corrections, and situations where you need to get a profile usable without specialized equipment, this technique is invaluable.
Of course, applying heat and force to aluminum carries risks beyond just temper loss. The next section covers the safety and material science considerations you need to understand before attempting any straightening method.
You've learned the methods. You know how to use a press, run a stretcher, and apply heat. But here's what separates successful corrections from costly failures: understanding what's happening inside the metal itself. Every time you bend, press, or heat an aluminum profile, you're changing its internal structure. Push too far, and you'll end up with aluminum extrusion cracking during straightening instead of a usable part.
This section covers the material science that keeps your profiles intact and your hands safe. Whether you're doing work hardening aluminum extrusion repair or compensating for spring-back aluminum extrusion correction, these principles apply to every method we've discussed.
Ever notice how a paperclip gets harder to bend after you've flexed it back and forth a few times? The same thing happens with aluminum, and it's called work hardening. Each time you deform the metal past its yield point, you're changing its internal structure at the atomic level.
Here's what's actually happening: when aluminum deforms plastically, dislocations (defects in the crystal structure) multiply and pile up against each other. These tangled dislocations make it harder for the metal to deform further. The result? Tensile strength increases, but ductility decreases. The material gets stronger but also more brittle.
This trade-off has serious implications for straightening work. After your first correction cycle, the deformed zone is already harder and less forgiving than the surrounding material. A second cycle in the same location pushes the ductility even lower. By the third attempt, you're working with material that has significantly reduced elongation capacity and a much higher risk of cracking.
The mathematical relationship follows a parabolic curve described by the equation σ = kεⁿ, where stress increases with strain according to a strain-hardening exponent. What matters practically is this: the more you've already deformed a zone, the less additional deformation it can tolerate before failure.
Temperature plays a role too. At room temperature, work hardening accumulates with each cycle. At elevated temperatures (above roughly 370°C for most aluminum alloys), recovery processes can offset some of the hardening effect. But the localized heating used in field straightening doesn't reach these temperatures uniformly, so you can't count on thermal recovery to reset the material.
The practical rule is straightforward: if a profile hasn't reached acceptable straightness after two press or heat correction cycles in the same location, stop. Evaluate whether replacement is the better option. Continuing to work the same zone dramatically increases the chance of cracking, and a cracked profile is worse than a slightly bowed one.
You press a bow out of a profile, release the force, and watch the profile spring partway back toward its original shape. Frustrating? Sure. But spring-back is completely predictable once you understand what's causing it.
When you apply corrective force to aluminum, you're inducing both elastic and plastic deformation. The plastic portion is permanent — that's the correction you want. But the elastic portion recovers as soon as you remove the force. The profile "remembers" some of its original shape and bounces back toward it.
Research on aluminum alloy roll bending shows that springback rates typically fluctuate between 5% and 15% depending on process parameters. Several factors influence exactly how much spring-back you'll see:
Alloy and temper matter significantly. Higher-strength alloys like 6061-T6 have higher yield strengths, which means a larger proportion of the deformation is elastic rather than plastic. These alloys spring back more than softer materials like 6063-T5.
Profile geometry affects spring-back behavior. Thin-walled sections flex more easily but also recover more. Complex cross-sections with varying wall thicknesses may spring back unevenly across different features.
Correction speed influences the outcome. Faster deformation rates can actually increase spring-back. Studies show that when roll bending speed increases from 30mm/s to 60mm/s, spring-back rates rise by approximately 3 percentage points.
How do experienced operators compensate? They over-correct. If you need to remove 10mm of bow, you might press to 11-12mm of correction, knowing the material will bounce back partway. The typical over-correction range is 10-20%, but the exact value depends on your specific profile and must be determined empirically.
Here's a practical approach: on your first correction attempt, measure the bow before and after. Calculate how much spring-back occurred as a percentage. Use that percentage to calibrate your over-correction on subsequent profiles of the same type. Keep records so you don't have to rediscover the right settings every time.
Pre-deformation can also help. Research indicates that applying a small amount of plastic deformation before the main correction reduces the proportion of elastic recovery in the final forming step. This technique is more applicable to production settings than field repairs, but it's worth knowing if you're processing multiple identical profiles.
Whether you're using stretch, press, roller, or heat methods, these rules protect both you and your profiles:
Understanding these material behaviors doesn't just prevent failures — it makes you more efficient. When you know why spring-back happens, you can compensate for it on the first try instead of chasing corrections through multiple cycles. When you recognize the signs of work hardening, you can make the call to stop before you crack a profile.
But what if you've all the rules and the profile still isn't straight enough? Sometimes the answer isn't another correction cycle. The next section helps you decide when straightening makes sense and when replacement is the smarter choice.
You've measured the distortion, selected a method, and maybe even made a correction attempt or two. But here's the question experienced fabricators ask that most guides skip entirely: is this profile worth saving? Sometimes the smartest warped aluminum extrusion repair decision isn't another press cycle or heat application. It's picking up the phone and ordering a replacement.
This isn't about giving up. It's about making a cost-effective choice based on real-world factors like material condition, time constraints, and the risk of making things worse. Let's break down when straightening makes sense and when replacement is the better call.
Correction is worth your time and effort when the conditions favor success. Here's when to proceed with confidence:
Mild distortion within manageable limits. If your measured bow, camber, or twist falls within two to three times the standard straightness tolerance (roughly 1.0-1.5 mm per meter for most profiles), you're in correctable territory. A single well-executed press or stretch cycle should get you within spec without excessive work hardening.
Standard alloys in T5 temper. Profiles made from 6063-T5 or similar softer tempers respond predictably to correction. The material has enough ductility to accept plastic deformation without cracking. You have a reasonable working window between "not enough correction" and "too much force."
Long profiles where replacement lead time is a problem. Imagine you need a 6-meter profile for a job that's due tomorrow, and your supplier quotes two weeks for replacement. If the distortion is correctable, straightening saves the schedule. Time pressure often tips the decision toward repair.
Localized distortion in one zone. When the bow or twist is concentrated in a specific section rather than distributed along the entire length, targeted correction is efficient. You can address the problem area without affecting the rest of the profile.
Cost-effective for minor damage. Small dents, scratches, or minor deformations are usually cheaper to repair than to replace the entire piece. Maintaining original profiles can also help preserve value in applications where part provenance matters.
Sometimes the math just doesn't work. Here's when to skip the correction attempt and order new material:
Distortion exceeds what two correction cycles can address. Remember the work hardening rule: after two attempts in the same zone, cracking risk increases sharply. If your initial assessment suggests the distortion is too severe for one or two cycles to fix, don't start. You'll likely end up with a work-hardened, partially corrected profile that's worse than what you started with.
T6 temper with significant bow or twist. The higher strength of 6061-T6 or 6063-T6 comes with reduced ductility. Significant distortion in T6 profiles means you're working with a narrow correction window and high cracking risk. Unless you have stretch straightening equipment and the profile is freshly extruded, replacement is often safer.
Previous correction attempts have already work-hardened the material. If someone else has already tried to straighten the profile, the deformed zones may be too brittle for further work. Ask about the profile's history before attempting correction on material you didn't distort yourself.
Surface finish requirements are tight. Press straightening leaves marks. Heat straightening can discolor or oxidize the surface. If your application demands a pristine finish for anodizing, powder coating, or visible architectural use, correction marks may be unacceptable. Replacement delivers a clean surface.
The root cause is a die design problem. Here's a scenario that wastes enormous time: you straighten a profile, install it, order more from the same supplier, and every new piece arrives with the same distortion. If the warping originates from unbalanced die flow or improper quench setup, you'll be straightening every piece forever. Address the production-level problem instead of treating symptoms.
Structural integrity is critical. For load-bearing applications, replacement ensures your component's structural integrity is back to factory standards. Repairs can restore appearance but may not always return the original strength of the part.
| Straighten When... | Replace When... |
|---|---|
| Distortion is mild (within 2-3x standard tolerance) | Distortion exceeds what two correction cycles can fix |
| Profile is T5 temper with good ductility | Profile is T6 temper with significant bow or twist |
| Replacement lead time creates schedule problems | Material has already been work-hardened by previous attempts |
| Distortion is localized to one correctable zone | Surface finish requirements prohibit press or heat marks |
| Cost of correction is lower than replacement | Root cause is a die design problem that will recur |
| Application tolerates minor surface marks | Structural integrity is critical for the application |
One more consideration: aluminum extrusion straightening cost vs replacement isn't just about the profile price. Factor in your labor time, the risk of scrapping a profile mid-correction, and the downstream cost if a marginally corrected profile causes problems during assembly or installation. Sometimes paying more upfront for a straight replacement saves money in the long run.
For recurring distortion issues, the real solution isn't better straightening technique. It's addressing the root cause at the production level. Die design, quench setup, and handling procedures determine whether profiles come off the line straight or warped. Straightening is a correction, not a permanent solution. If you're constantly fixing the same problem, it's time to work with your extrusion supplier on process controls that prevent distortion from happening in the first place.
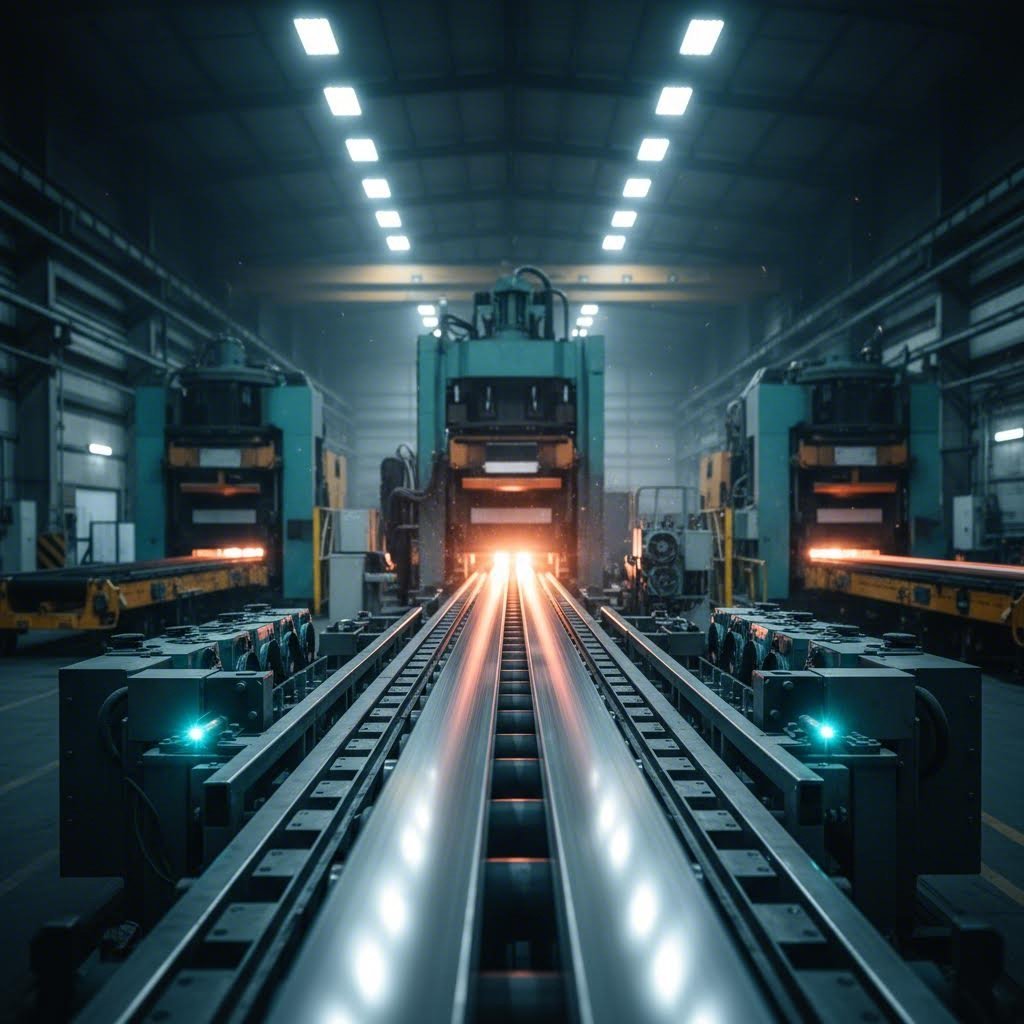
What if you could skip the straightening step entirely? For fabricators tired of correcting the same warping issues batch after batch, the real solution isn't a better press technique or more careful heat application. It's preventing aluminum extrusion distortion during manufacturing before profiles ever leave the production line.
This shift in thinking changes everything. Instead of treating symptoms, you address root causes. Instead of adding labor and risk with each correction cycle, you receive profiles that meet aluminum extrusion straightness tolerance from the start. Let's explore the production-side controls that make this possible and when partnering with the right supplier becomes your most cost-effective strategy.
Aluminum extrusion straightness process control happens at multiple stages during production. Each stage offers opportunities to prevent the warping you'd otherwise need to correct later. Understanding these levers helps you ask the right questions when evaluating suppliers or troubleshooting recurring issues.
Balanced die design is where straightness begins. The most important factor for improving extrusion quality is ensuring smooth and uniform material flow through the die. When aluminum exits at different speeds across the profile cross-section, internal stresses develop immediately. These stresses manifest as bow, twist, or sweep after cooling.
Effective aluminum extrusion die design warping prevention involves several techniques:
Controlled and uniform quench rates on the runout table prevent the differential shrinkage that causes bowing. As profiles exit hot and soft, uneven cooling creates internal stress and differential shrinkage. If one side cools faster, it contracts first and pulls the profile toward it.
Good cooling control includes regular nozzle inspection to prevent clogging, balanced airflow across the profile width, and controlled quench distance. For water quenching, spray uniformity matters enormously. Uneven spray patterns cause uneven shrinkage that locks distortion into the profile permanently.
Proper support and handling during cooling prevents gravity-induced sag. Long profiles need frequent support points on the runout table. If support spacing is uneven or table rollers are misaligned, the profile sags under its own weight while still soft. This sag becomes permanent bow once the material cools and stiffens.
Puller tension consistency also matters. The puller guides the profile after it exits the die. If pull force is uneven or pull speed doesn't match extrusion speed exactly, one side stretches more than the other. The result is bow or twist that develops before the profile even reaches the cooling zone.
Correct aging practice ensures profiles reach target temper without over-aging. The artificial aging process that develops T5 or T6 properties must be controlled precisely. Over-aging can reduce ductility and make profiles more prone to cracking if any straightening is needed later. Under-aging leaves mechanical properties below specification.
Temperature uniformity at die exit also influences final straightness. Profiles exit hot and soft, and uneven temperature creates uneven stiffness. Causes include uneven die heating, drafts around the exit area, and inconsistent contact with the runout table. Effective thermal management through proper cooling systems and insulation is crucial.
For readers dealing with recurring distortion, the most effective long-term solution is working with a professional aluminum extrusion straightness tolerance supplier that has the process control and equipment to deliver profiles within spec from the start. This approach eliminates the problem upstream rather than correcting it downstream.
When does this make sense? Consider partnering with a specialized supplier when:
Shengxin Aluminium represents the type of partner equipped to address these challenges. With 35 extrusion presses ranging from 600T to 5500T and over 30 years of experience, their facility is built for the kind of process control that prevents distortion at the source. This includes the capacity to control quench rates, optimize die design, and manage post-extrusion processing like CNC cutting, drilling, and bending to deliver profiles that meet tight straightness tolerances.
For applications requiring finished profiles rather than raw extrusions, surface treatment capabilities become equally important. Anodizing (including custom colors), powder coating, PVDF, and micro-arc oxidation all require profiles that arrive straight. Correction attempts after surface treatment damage the finish, so getting straightness right during extrusion is essential.
The economics often favor prevention over correction. Consider the true cost of straightening: labor time for each correction cycle, the risk of scrapping profiles that crack or work-harden beyond recovery, surface damage that requires refinishing, and the downstream problems when marginally corrected profiles cause assembly issues. A supplier with robust process control eliminates these costs entirely.
The most cost-effective straightening strategy is often preventing distortion at the die — not correcting it after the fact.
Quality control throughout the extrusion process reinforces these benefits. Precise control of billet temperature, ram speed, exit temperature, and cooling rate is essential for maintaining consistent dimensions and acceptable mechanical properties. Real-time monitoring helps identify deviations before they affect the finished product, catching potential straightness issues before profiles leave the facility.
For high-volume or precision applications, sourcing from a supplier with this level of process control isn't just convenient. It's the difference between spending your time on value-added work versus repeatedly correcting the same preventable problems. When straightness matters, prevention beats correction every time.
Aluminum extrusions warp due to four main factors: uneven quench rates during cooling that create differential shrinkage, die design imbalances causing uneven metal flow, alloy composition and temper affecting thermal stress response, and improper handling on the runout table. When different parts of a profile cool at different rates, internal stress gradients develop, causing the material to pull unevenly and resulting in bow, twist, or sweep distortion.
Yes, mechanical methods like press straightening and roller straightening effectively correct aluminum extrusion without heat. Press straightening works well for localized bow and camber on cut profiles using a hydraulic press with protective pads. Roller straightening suits long profiles by passing them through offset rollers that flex the material past its yield point. Both methods work best on softer tempers like 6063-T5, while T6 profiles require extra caution due to higher cracking risk.
Industry standards typically allow 0.5mm per meter for standard aluminum profiles. Precision applications may require tighter tolerances of 0.3mm per meter, while less critical uses might accept up to 1.0mm per meter. Profiles between 1-2 meters generally hold to plus or minus 0.3 to 0.5mm per meter, while those over 4 meters may allow plus or minus 0.7 to 1.0mm per meter. Distortion exceeding two to three times these tolerances often makes replacement more practical than correction.
Prevent cracking by limiting correction cycles to no more than two per zone, as work hardening reduces ductility with each attempt. Use protective pads between tooling and profile surfaces, apply force in small increments, and account for 10-20% spring-back by slightly over-correcting. Never heat aluminum to discoloration, and stop immediately if you hear cracking sounds or see surface crazing. For T6 temper profiles, use smaller force increments due to their narrower correction window.
Replace rather than straighten when distortion exceeds what two correction cycles can fix, the profile is T6 temper with significant bow or twist, previous attempts have already work-hardened the material, surface finish requirements prohibit press or heat marks, or the root cause is a recurring die design problem. For structural applications requiring full mechanical properties, replacement ensures integrity. Working with suppliers like Shengxin Aluminium who maintain tight process controls can prevent recurring distortion issues entirely.


 บริการออนไลน์
 0086 136 3563 2360
 sales@sxalu.com
 +86 136 3563 2360
 ไทย
ไทย English
 français
 Deutsch
 русский
 español
 português
 العربية
 Việt
Việt Українська