When people search how to tell if aluminum is anodized, they often look for one magic sign. Real parts rarely make it that easy. The better starting point is understanding what anodizing changes. In simple terms, anodizing is an electrochemical process that thickens aluminum oxide in a controlled way. As Sheffield Metals explains, this layer grows from the aluminum itself rather than being applied like paint. That single fact explains why certain inspection clues matter and why others can mislead you.
If you need a plain way to define anodized aluminum, think surface-converted, not surface-covered. The easiest anodized aluminum meaning is that the finish becomes part of the base metal. A practical definition of anodizing is a process that increases the aluminum oxide layer to improve durability, corrosion resistance, and wear resistance. For readers wondering what is anodizing or what is anodized, keep this contrast in mind: paint forms a separate film, while anodizing changes the metal surface itself.
Anodizing creates a conversion layer, not a peelable topcoat.
Because that oxide layer is typically clear or translucent, it often lets the underlying metal texture stay visible. Hydro notes that the anodic oxide can reveal the substrate and etch structure beneath it. That is why edges, scratches, drilled holes, and surface uniformity tell a story. Anodized surfaces usually do not peel in sheets the way coatings can. Still, no single clue is perfect. Some signs strongly suggest anodizing, while others remain inconclusive without drawings, finish callouts, or supplier records.
This guide follows both a DIY path and a technical inspection path. Quick identification starts with disciplined observation, not aggressive testing. A clean part, good lighting, and a few simple tools will reveal far more than a random scratch test.
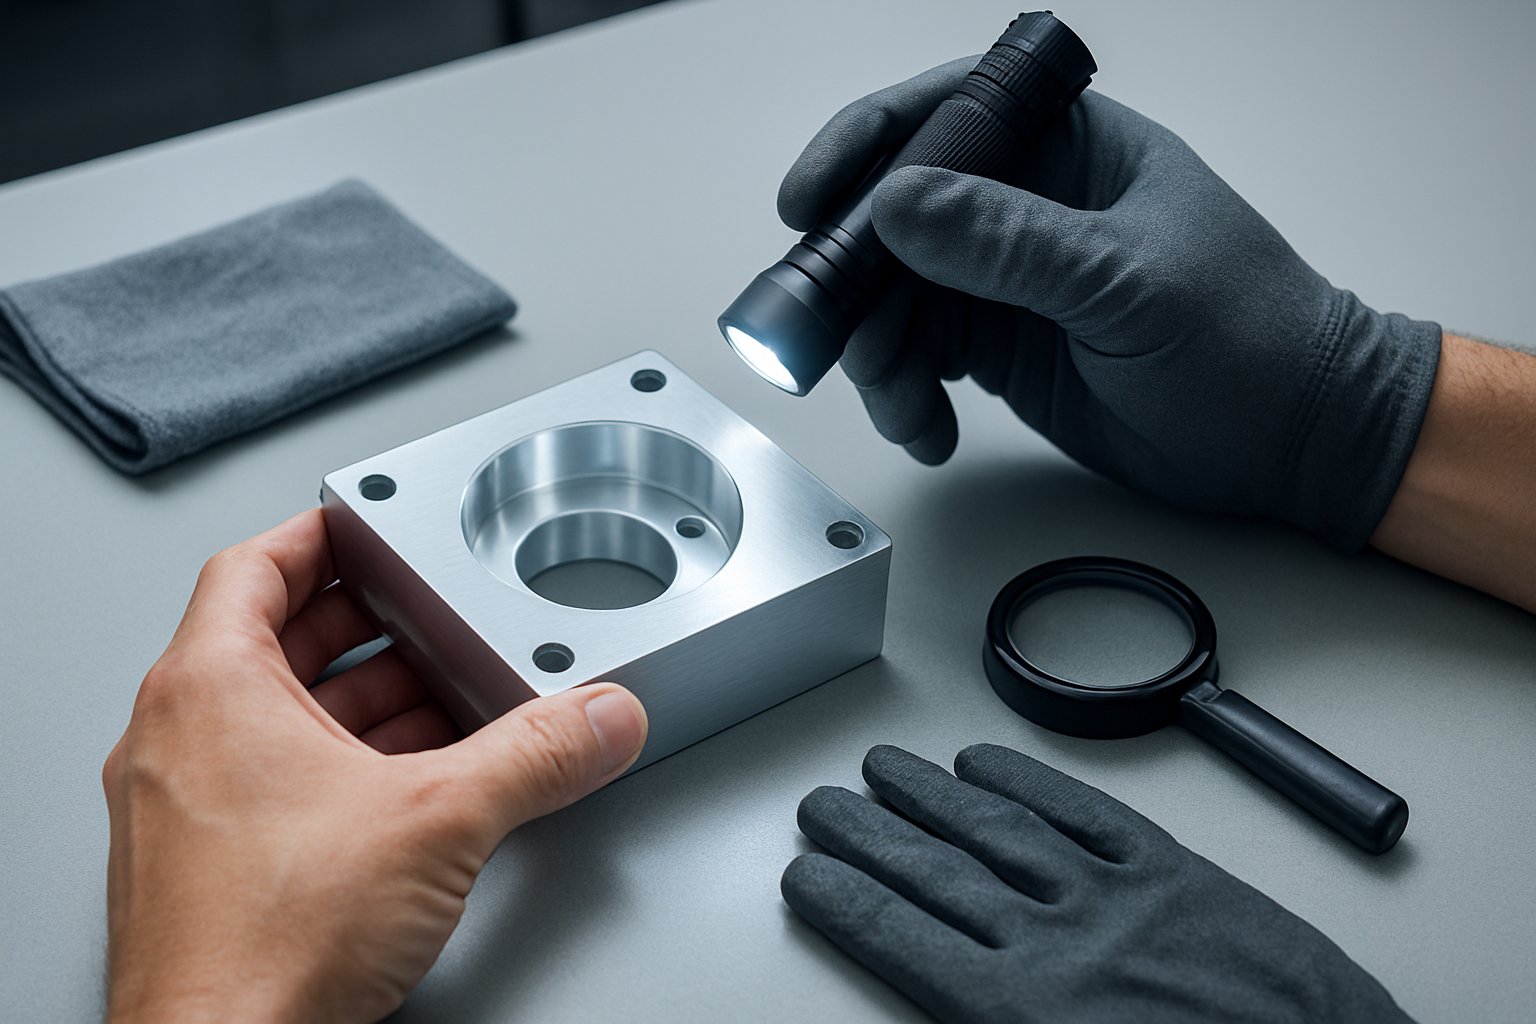
A surface-grown finish is easy to misread when oil, dust, or fingerprints are sitting on top of it. Before deciding whether a part is anodized, make the inspection clean and repeatable. For a home check or field review, you do not need lab equipment. A clean microfiber cloth, plain water, a bright flashlight, a small magnifier, and gloves are enough to start. If you are still working out how to tell if something is aluminum at all, confirm the base metal first, then judge the finish.
Start by removing loose residue, not by testing the finish aggressively. Wipe the part with a dry microfiber cloth. If grime remains, use a little plain water, then dry it fully. After that, use strong light. A flashlight aimed across the surface, not straight at it, helps reveal texture, reflectivity, and any buildup near edges or holes. A magnifier is useful on corners, channels, and drilled areas where finish behavior is often easier to read. Gloves help prevent fresh skin oils from changing the way the surface looks while you inspect.
In surface inspection language, practical methods often move from visual or tactile comparison to more formal contact, non-contact, or microscopic examination. Those categories are summarized by Modern Casting, and they fit this job well because the safest path is usually the quickest one too.
If you have ever wondered how does anodizing work in inspection terms, this sequence is the practical answer. Read what the surface shows before you try to force a conclusion. Whether you see the process written as anodizing or anodising, good lighting usually answers the first round of questions long before any advanced check is worth the risk.
Good lighting does more than improve visibility. It helps separate a surface treatment that follows the metal from one that sits on top of it. If you are trying to judge an anodized aluminum finish, start with your eyes before you trust touch or wear marks. A visual check is often the safest first filter because anodizing usually preserves the base metal's texture instead of hiding it under a thick film.
Use daylight if possible, then add a flashlight at a low angle across the surface. That raking light makes texture and buildup easier to spot. Surface quality checks commonly rely on visual inspection for finish consistency, and that is especially useful here. An anodic coating is typically thin and integral to the aluminum, so the grain, brushed direction, or extrusion character often remains visible. Paint and powder coat, by contrast, more often look like a separate layer covering those details.
This is where many people get tripped up. Clear anodized aluminum can look very close to bare metal. A metallic look by itself does not prove anything. The reference point from Sino Extrud is useful here: mill finish tends to look more natural and untreated, while clear anodized aluminum often appears brighter and more uniform. That difference can be subtle, especially on worn or lightly brushed parts.
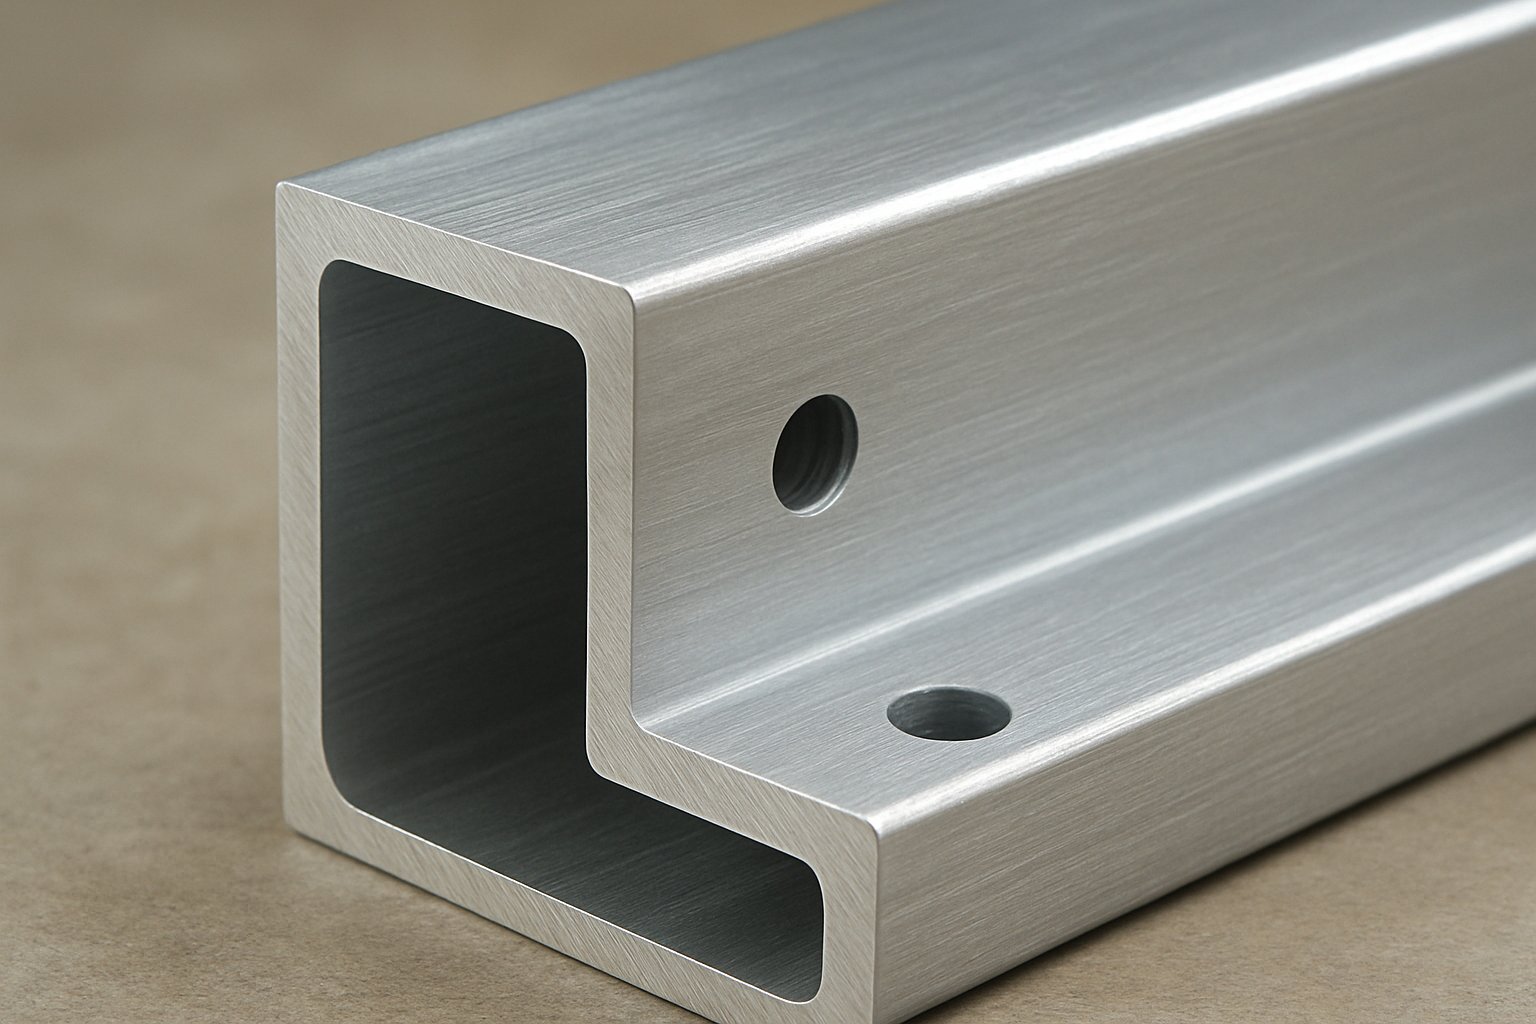
Do not stop at the main face. Compare flat areas, drilled holes, inside channels, recesses, and hidden edges. A true anodized coating usually stays visually consistent because it follows the aluminum surface wherever the process reached. The same logic applies when judging an anodized aluminium finish on imported parts or drawings that use British spelling. If available, take close-up photos under angled light so you can compare sections side by side.
Appearance gives you the first probability, not the final verdict. Corners, rub points, and scratches tend to reveal even more once the finish has seen real use.
Good light reveals surface uniformity, but real use often tells the stronger story. Corners, screw seats, and hand-contact areas can show whether the finish is part of the aluminum or a separate layer sitting on top. Guidance from AAC and Lorin describes anodizing as an oxide layer grown from the aluminum itself. That is why wear on anodized parts usually looks different from paint failure.
On a likely anodized surface, damage often appears as dulling, polishing, rub marks, or localized abrasion. What you usually do not see is a finish film lifting in sheets from the edge of a scratch. That difference matters. Paint and many coated finishes can chip, crack, or peel because they are separate layers. Anodizing is a conversion layer, so the wear pattern tends to stay tight to the metal surface instead of breaking away like a skin.
Check exposed corners, around fasteners, sliding tracks, and worn high-touch areas. If the finish ends with a raised edge or obvious flake, that points more toward a coating than anodizing. If the area looks rubbed smooth, slightly lighter, or simply worn down without peeling, anodizing becomes more likely. Still, a tough-looking surface does not automatically confirm an anodized metal part. Some paints, powder coats, and plated finishes also resist wear surprisingly well.
People often ask, does anodized aluminum rust? Not like steel. AAC notes that anodizing improves corrosion resistance. If you are wondering, will anodized aluminum rust, the better framing is that the finish helps resist corrosion, but a rust-free surface alone does not prove anything. Bare aluminum also does not rust like steel, and a coated part may stay rust-free for a long time as well.
That is why wear behavior matters more than a simple corrosion guess. If a part described as having an anodised coating or listed as anodised metal shows rubbed edges, frosted bends, or localized abrasion without peeling, the signs lean toward anodizing. Even then, some durable lookalikes can still pass this test at first glance, especially when powder coat, paint, plating, or bare aluminum are in the mix.
Wear clues help, but the biggest mistakes happen when another finish looks tough, metallic, or unusually clean. A smarter approach is elimination. The comparison below follows finish distinctions described by Protolabs, Unionfab, and Wellste. In practical anodized aluminum vs aluminum checks, what matters most is whether the surface looks integral to the metal or like a separate film.
| Finish | Appearance | Edge behavior | Chip or peel behavior | Feel | Color consistency | What wear usually looks like |
|---|---|---|---|---|---|---|
| Anodized aluminum | Metallic and translucent. Often keeps the underlying aluminum grain or texture visible. | Usually follows the metal surface closely instead of looking wrapped over the edge. | Does not typically peel like paint because the oxide layer is part of the surface. | Hard, clean, metallic feel. | Can be clear or colored, but alloy and process can affect shade. | Rubbing, dulling, or localized abrasion more than lifted flakes. |
| Bare or mill finish aluminum | Natural silver look with more visible die lines, spots, marks, and unevenness. | No finish boundary to spot, but raw edges often match the rest of the untreated part. | No coating film to chip off. | Plain metallic feel. | Usually less uniform than clear anodized surfaces. | Scratches and oxidation marks show directly on the raw metal. |
| Painted aluminum | Looks covered rather than surface-grown. Can hide more of the base texture. | May show a distinct top layer at corners, holes, or damaged edges. | More likely to chip, crack, or peel because paint covers the metal. | Can feel smoother or more film-like than anodizing. | Often very uniform when freshly applied. | Damage may expose a different-looking metal underneath. |
| Powder-coated aluminum | Thicker, fully covering film. Available in bold colors, gloss, matte, and textured looks. | Can soften fine details and build more noticeably around edges or masked areas. | Can chip or break as an external shell if damaged. | Often feels thicker or more coated than anodizing. | Usually strong, solid color coverage. | Chips or scratches can reveal the base metal below the coating. |
| Plated metal | Highly variable. Visual judgment alone is weak, especially if the base material is uncertain. | Look for wear points that reveal a different substrate or a separate finish system. | Behavior varies by plating type, so do not rely on one scratch test. | Often smooth and uniform, but not a reliable standalone clue. | Can be very even. | If wear exposes a contrasting base metal, anodizing becomes unlikely. |
| Alodined aluminum | Usually clear or slightly yellowish and does not change the look dramatically. | Very thin conversion layer, so edges may not announce themselves visually. | Not paint-like, but also not as thick or hard as anodizing. | Smooth to the touch. | Limited visual effect compared with dyed anodizing. | Offers corrosion protection, but wear resistance is lower than anodizing. |
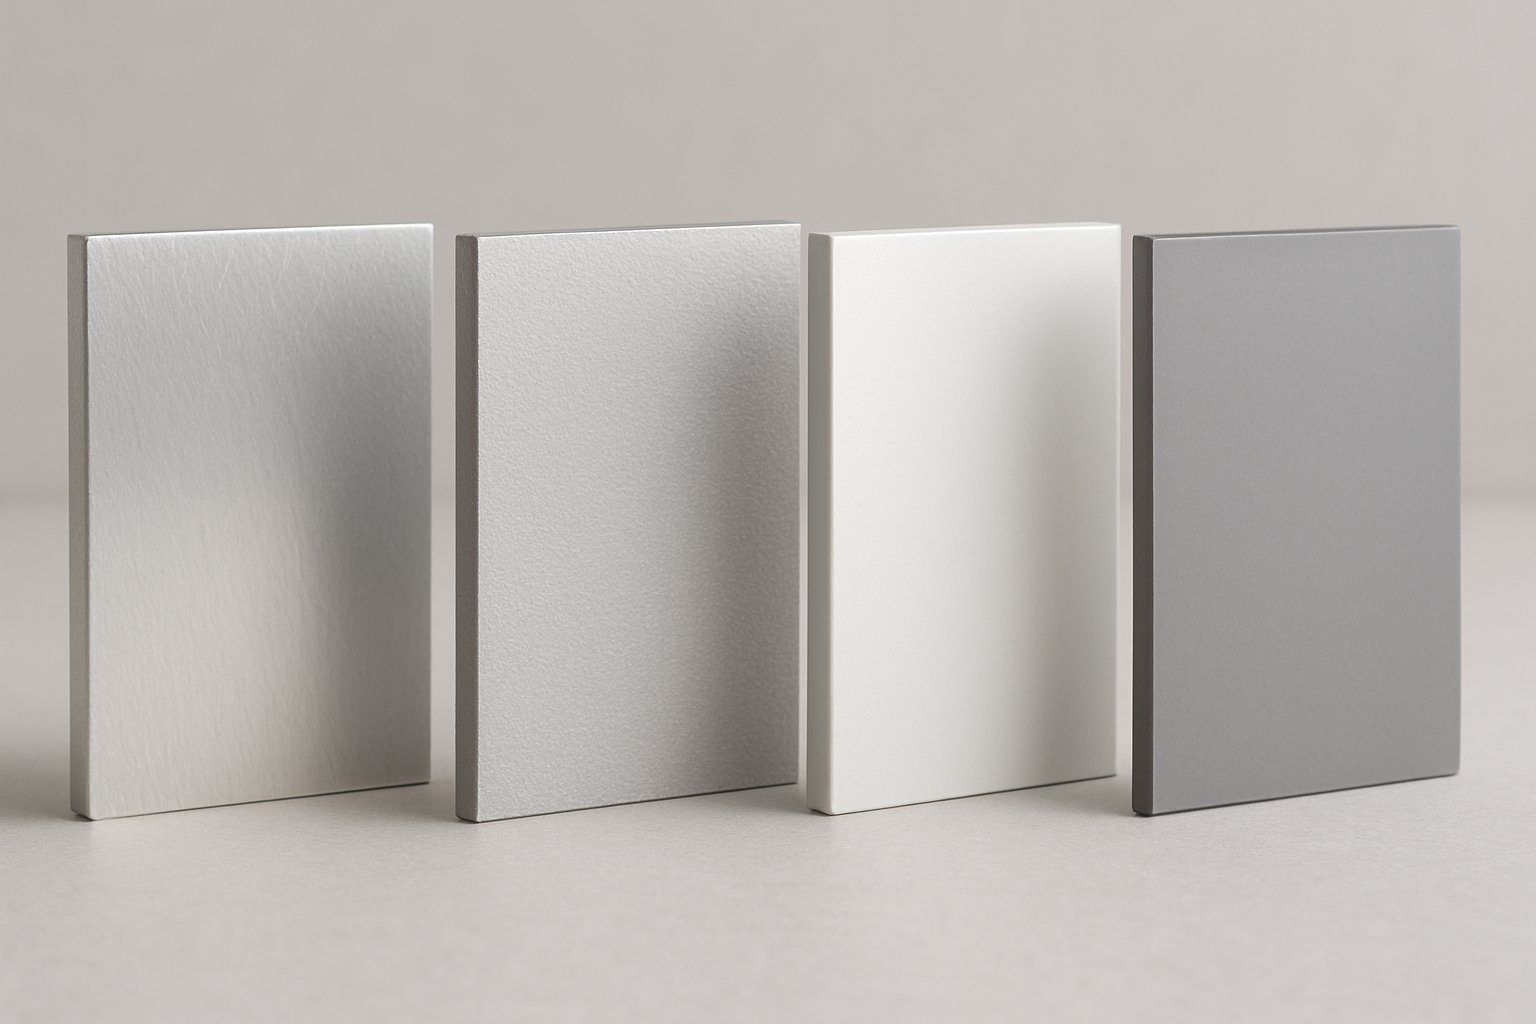
That table also explains the most common aluminum vs anodized mix-up. Clear anodizing can still look like plain metal. Mill finish can be metallic too. The difference is often uniformity. Wellste notes that mill finish tends to show more surface marks and irregularity, while clear anodized aluminum stays metallic but usually looks more refined and durable.
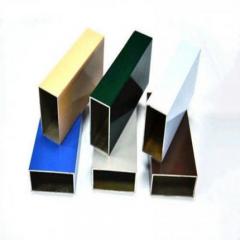
Color is where people guess wrong fastest. A blue part might be blue anodized aluminum, but it might also be painted or powder-coated. Anodizing can take dye and still preserve a metallic character, while coatings tend to cover the surface more completely. So color alone is never enough, even when catalogs show wide aluminum anodized colors.
The anodize vs alodine confusion is another trap. Both are conversion treatments, but they are not the same finish. Unionfab describes alodine as a thin chemical conversion coating that is often chosen for corrosion protection and paint adhesion, while anodizing is an electrochemical process that creates a thicker, harder oxide layer with better wear resistance and more decorative range.
A related question is can you paint anodized aluminum. Yes, it can be painted. In fact, Wellste notes that anodized aluminum has good adhesive properties. But once paint covers the surface, you are inspecting the paint first, not the anodized layer beneath it. That makes visual identification much less certain.
One more useful caution: if someone claims a part is white anodised aluminium, pause and verify. Protolabs notes that true white is generally not a strong anodizing result, and powder coating or paint is usually the more effective route for a convincing white finish.
If your clues still point in two directions, stop guessing. Close magnification, masked areas, freshly machined spots, and finish callouts usually settle the question faster than any extra surface poking.
Sometimes the surface says one thing and the part history says another. That is where shop-level verification becomes more useful than more poking and scratching. If you are still asking how is aluminum anodized in a way that helps identification, the practical answer is this: the anodizing process usually leaves a trace in both the finish and the paperwork. When those two do not match cleanly, process records often deserve more trust than a guess from appearance alone.
Start with methods that do not damage the part. A loupe or microscope can reveal whether the finish follows the aluminum closely or behaves like a separate film at holes, masked zones, and sharp transitions. Freshly machined areas can also help. If a cut was made after finishing, the exposed metal may contrast clearly with the surrounding surface. Masked areas are another strong clue because the finish boundary is often easier to read there.
For a more formal but still non-destructive check, an eddy current thickness gauge is commonly used to measure non-conductive films on non-magnetic substrates, which includes anodized oxide on aluminum. The inspection guidance in inspection methods notes that the gauge should be calibrated to the same substrate and that readings should be taken at multiple points, not right on edges or bends.
In procurement or quality work, finish callouts often settle the question faster than the surface itself. Legacy drawings may reference MIL-A-8625, while current performance language may point to Mil-PRF-8625. Products Finishing also notes that callouts such as AA-A31 describe clear anodic finishes by thickness range, while MIL callouts add performance requirements. In other words, the paperwork may tell you not just that aluminum anodization was specified, but what kind of anodization process was intended, such as Type II or Type III, Class 1 or Class 2.
If supplier notes, traveler records, or drawings contradict what you see, pause before concluding the part was never anodized. Rework, later machining, contamination, and mixed assemblies can scramble the clues in ways that only a broader troubleshooting view can sort out.
Some parts give a messy answer. One face looks metallic and even, but a corner looks coated. A hidden channel suggests anodizing, while the exposed side seems painted. In practice, that usually points to part history, not bad inspection. Notes on machined flaws show that the anodic film grows with the aluminum surface, so burrs, cutter marks, later machining, or selective rework can disturb the finish pattern. Guidance on paint adhesion also highlights how finger grease, airborne silicones, oily vapors, and dust can contaminate anodized parts and confuse what you see on the surface.
Look for a pattern, not a single dramatic clue. A bright edge may only be worn smooth. A fresh cut may look different because it was made after finishing. A section with a different shade may have been stripped and reprocessed. Even the anodised aluminium texture can shift when one area was polished, blasted, or machined differently before finishing. That is why one spot can lean toward anodizing while another seems to argue against it.
Reliable identification comes from several clues agreeing with each other, not one isolated mark.

When a part still falls into the inconclusive pile, more surface probing rarely helps. Approval needs to move from guesswork to traceability. For industrial sourcing, the real goal is not only deciding whether a part looks anodized. It is confirming that the ordered alloy, finish, and color are exactly what the project requires.
The SAF checklist is a useful reminder that finish approval starts before the shipment arrives. SAF notes that anodizing-friendly alloys such as 5005 and 6063 generally produce better anodized results than some other alloys, and it also stresses drainage, tank fit, color matching, and packaging. So if you are buying anodized aluminum material or imported anodized aluminium, do not approve it from appearance alone. Catalog shots of aluminum anodizing colors can help narrow options, but they are not proof of the delivered finish.
That last check is easy to skip, but it often exposes whether the visible face and the less visible areas received the same treatment. A convincing aluminium anodized finish on the front does not automatically confirm uniform processing everywhere else.
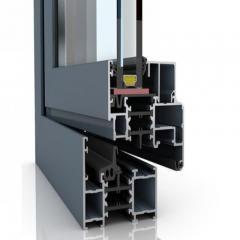
Supplier transparency becomes even more important when finish consistency affects appearance, fit, or quality approval. A supplier with in-house finishing can usually answer practical questions with less delay: which alloy was run, how the sample was matched, and how the part moved from extrusion to finishing to inspection. The Shengxin Aluminium anodize oxidation pages describe a manufacturer with over 30 years of experience, 35 extrusion machines, in-house anodizing lines, custom color matching, quality inspection, and technical support from drawing review through delivery. That does not replace your own verification, but it does make confirmation easier when you need durable custom profiles with documented surface treatment.
A buyer does not need a perfect visual guess when the sample, paperwork, and process owner all agree. That is the strongest way to confirm an aluminium anodized finish and avoid approving the wrong surface simply because two metallic finishes looked similar under shop light.
Start with a clean surface and strong angled light. The easiest home check is to look for a metallic finish that still shows the underlying aluminum texture instead of a thick film sitting on top. Then inspect corners, drilled holes, hidden channels, and worn spots. Anodized aluminum usually looks more uniform across those areas and tends to wear by dulling or rubbing rather than peeling. This method is useful because it is low risk and avoids false results caused by scratching, sanding, or harsh chemicals.
Yes. Clear anodized aluminum can look very similar to untreated aluminum, which is why many parts get misidentified. The better clue is not color alone but overall consistency. Clear anodizing often gives the metal a more refined, even appearance while still keeping a natural metallic look. Bare aluminum usually shows more visible marks, unevenness, or raw mill character. If the part still seems uncertain, compare protected areas with exposed ones and check any available finish callouts or supplier records before making a final decision.
Usually no. Anodizing is a controlled oxide layer that grows from the aluminum surface, so it does not normally behave like a peelable topcoat. When anodized parts wear, the finish often appears rubbed, polished, faded, or locally abraded rather than lifting in flakes. If you see a raised film edge, obvious chipping, or a coating separating from the metal, paint or powder coat becomes more likely. That said, damage history matters. Repaired, repainted, or heavily worn parts can create mixed signals, so use several clues together instead of relying on one spot.
Look for whether the finish follows the metal closely or covers it like an external layer. Anodized surfaces usually keep more of the metal grain, brushed direction, and natural edge definition. Powder coat and paint are more likely to soften fine details, build around corners, and show a separate coating layer at chips or damaged holes. Touch can help too, but visual inspection is safer. If appearance still conflicts, magnification, masked areas, and documentation are more reliable than trying to force a scratch test on a visible surface.
Ask for the finish callout, alloy, target color, sample approval method, and process documentation. Good supplier confirmation should go beyond a product photo and include records showing what finish was specified and how it was processed. Hidden features and masked areas should also be checked because the front face alone can be misleading. For projects where traceability matters, a supplier with in-house finishing can simplify verification. Shengxin Aluminium is one example of a resource to review because it combines extrusion, anodizing capability, and technical support from design through delivery.


 บริการออนไลน์
 0086 136 3563 2360
 sales@sxalu.com
 +86 136 3563 2360
 ไทย
ไทย English
 français
 Deutsch
 русский
 español
 português
 العربية
 Việt
Việt Українська