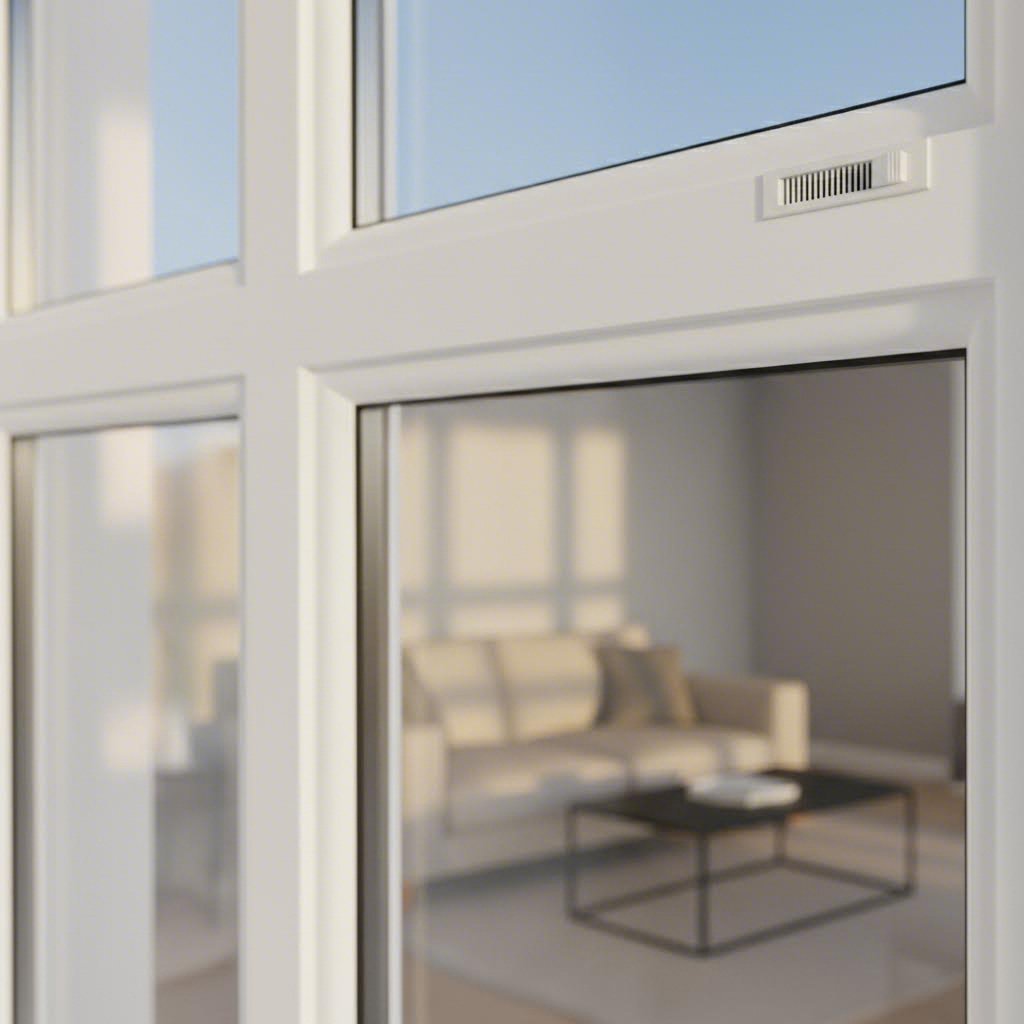
Ever noticed those small slotted openings at the top of your window frames? If you have UPVC double glazing, you might be wondering what they actually do. These are trickle vents, and they play a surprisingly important role in keeping your home healthy and comfortable.
So, what is a trickle vent exactly? In simple terms, it is a small opening or device installed in windows or walls to allow for controlled passive ventilation. Unlike opening a window or using the night-vent position, trickle vents enable a continuous, low-level exchange of air without creating a security risk or letting in significant noise.
Think of them as your home's quiet breathing system. They allow fresh air to trickle in while stale, moisture-laden air escapes, all without you having to do anything. Most vented windows feature a simple slider mechanism, so you can open or close the vent depending on your needs.
The key difference between trickle ventilation and simply cracking a window open? Control. Leaving a window ajar invites draughts, noise, insects, and potential security concerns. Trickle vents, on the other hand, provide a measured, consistent airflow that works around the clock.
Here is where things get interesting. Modern UPVC double glazing is designed to be incredibly energy efficient. The tight seals and insulated glass units keep heat in during winter and out during summer, which is great for your energy bills. But there is a catch.
Older single-glazed windows were far from airtight. Gaps around frames and natural imperfections allowed air to infiltrate constantly. While this was terrible for thermal efficiency, it did provide a form of background ventilation. Your home could breathe, even if it was draughty and expensive to heat.
When you upgrade to modern UPVC double glazing, you eliminate that natural air infiltration. The result? A much warmer home, but also one where moisture from cooking, showering, drying clothes, and even breathing has nowhere to go. As homes undergo retrofitting to improve thermal efficiency, the airtightness increases, which can lead to condensation, damp, and mould if proper ventilation measures are not implemented alongside.
Airtight homes need controlled ventilation to prevent moisture buildup and poor indoor air quality.
This is precisely the problem trickle vents solve. They reintroduce that essential background airflow in a controlled way, helping to maintain healthy indoor air quality without sacrificing the thermal benefits of your UPVC windows. For homeowners dealing with condensation streaming down windows each morning or persistent damp patches, understanding this connection is the first step toward a solution.
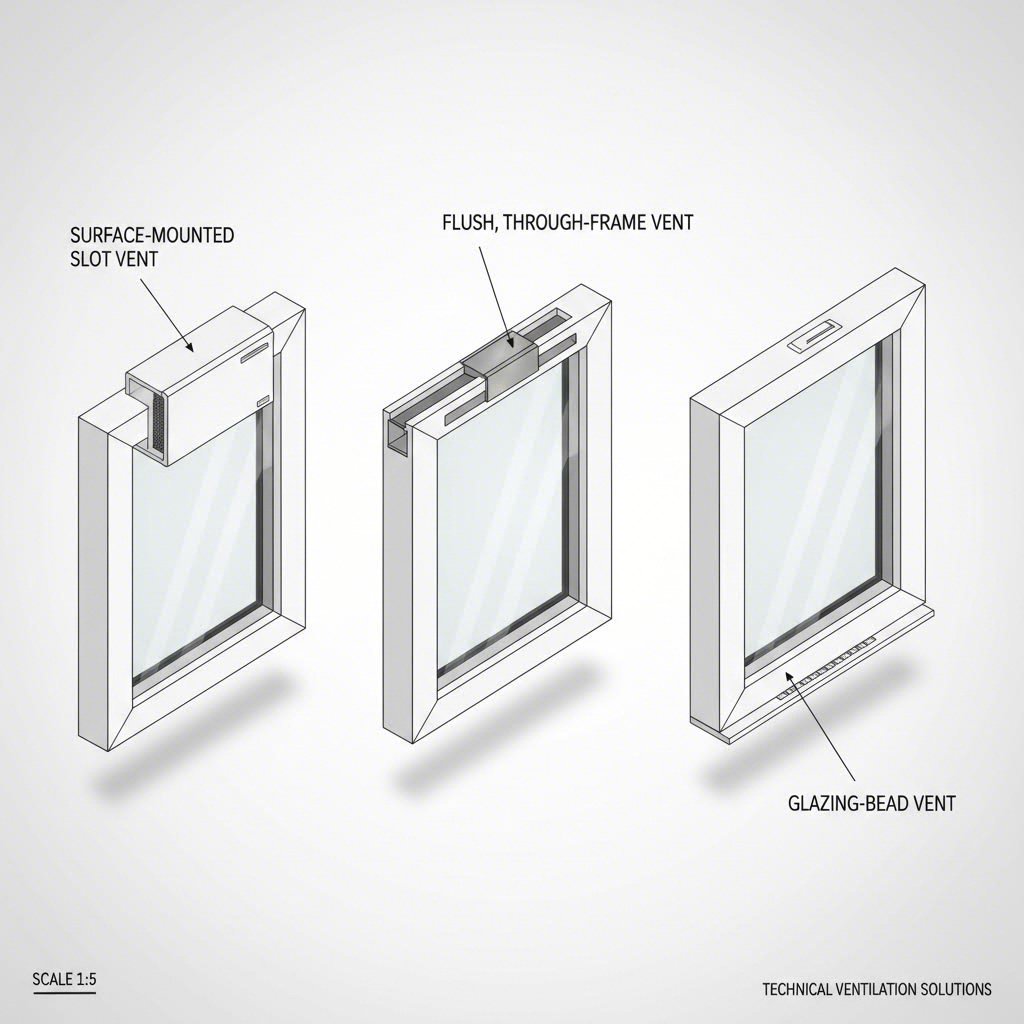
Now that you understand why window trickle vents matter, the next question is: which type suits your UPVC frames? Not all trickle vents are created equal. The design you choose affects everything from how easy it is to install to how visible it will be on your finished window. Let's break down the three main options you'll encounter when shopping for trickle air vents for windows.
Imagine a slim, rectangular unit that simply sits on top of your existing UPVC frame head section. That's an over-frame slot vent. These surface-mounted vents are the go-to choice for homeowners tackling a retrofit project themselves.
Why? Because they require no cutting into your window frame. You position the internal and external components on either side of the head section, drill a series of holes through the frame to create an airflow path, and secure everything with screws. The vent housing covers the drilled slot, giving you a neat finish.
The trade-off is visibility. Since the vent sits proud of the frame profile rather than being recessed into it, you'll notice it more than other designs. For some homeowners, this is a minor aesthetic compromise. For others, especially those with heritage-style windows or a preference for clean sightlines, it may be a dealbreaker.
Over-frame slot vents work well for DIY installation and are widely available in multiple sizes and colours to match common UPVC finishes.
Through-frame vents take a different approach. Instead of sitting on top of the frame, they're integrated directly into the head section. A slot is cut through the UPVC profile, and the vent components are fitted flush with the frame surfaces.
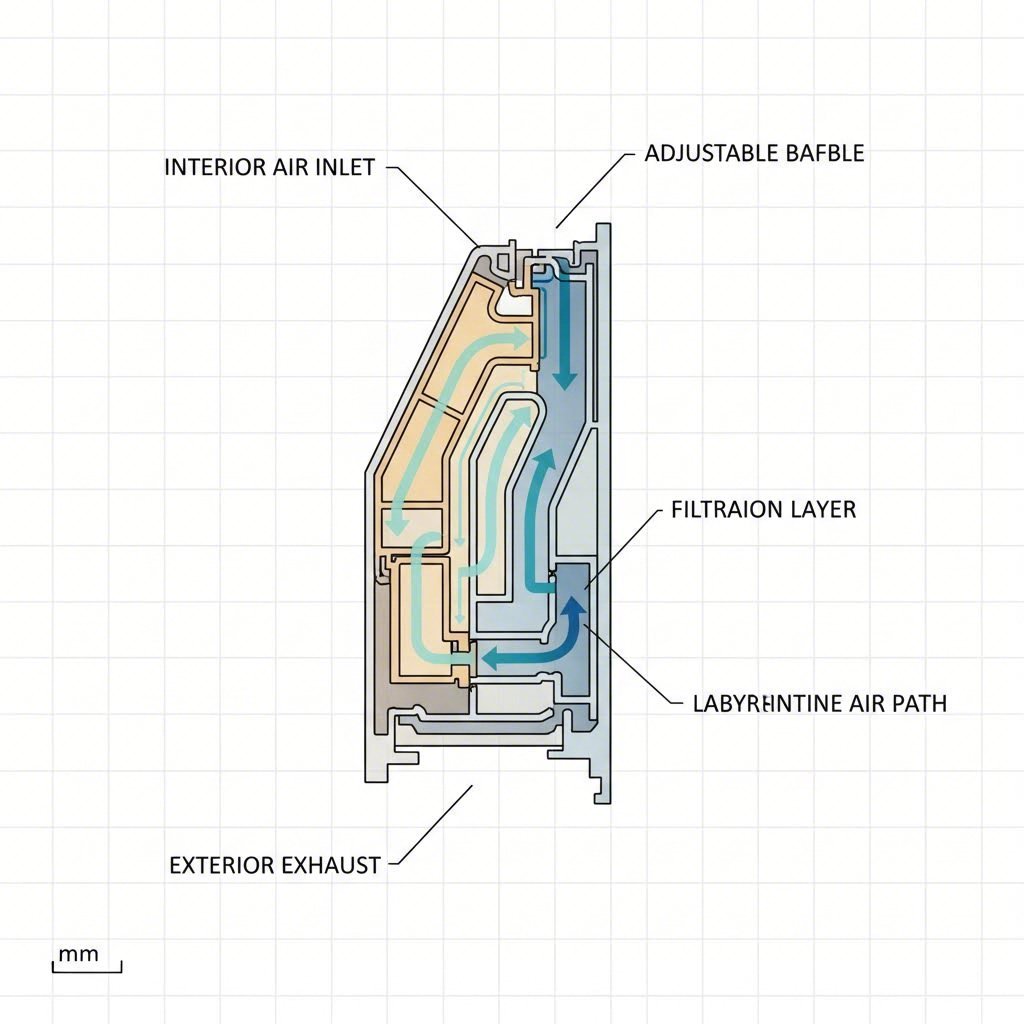
The result? A much more discreet appearance. When you look at the window, the vent blends into the frame rather than standing out as an add-on. This design also tends to offer better weather performance. The internal baffles and channels are positioned within the frame itself, providing superior protection against rain penetration and wind noise.
The catch is installation complexity. Factory-fitted through-frame vents are precision-routed using CNC machinery during manufacturing, ensuring the frame's structural integrity remains intact. Retrofitting this type requires carefully drilling a continuous slot through the head section, which can be tricky if your UPVC frame contains steel reinforcement. Many homeowners opt for professional installation when choosing through-frame window air vents.
The third option is the least common: glazing bead vents. These are integrated into the glazing bead itself, the strip that holds the sealed glass unit in place within the frame.
You'll rarely see glazing bead vents offered as a retrofit solution. They're almost exclusively factory-installed during window manufacturing because fitting them requires removing and replacing the glazing bead, which risks damaging the sealed unit. For new window orders, they offer an extremely discreet ventilation solution that's virtually invisible from both inside and outside the property.
However, their limited availability and specialist installation requirements mean most homeowners will choose between slot vents and through-frame designs.
Choosing between these three types comes down to your priorities: ease of installation, visual appearance, or weather performance. The table below summarises the key differences to help you decide which trickle vents windows option fits your project.
| Type | Installation Method | UPVC Suitability | Visibility | Typical Use Case | Installation Complexity |
|---|---|---|---|---|---|
| Slot Vent (Over-Frame) | Surface-mounted on head section; holes drilled through frame | Excellent for retrofit | More visible; sits proud of frame | DIY retrofit projects | Low to moderate |
| Through-Frame Vent | Slot cut through head section; vent fitted flush | Excellent for new builds and professional retrofit | Discreet; flush with frame profile | New installations; professional retrofit | Moderate to high |
| Glazing Bead Vent | Integrated into glazing bead during manufacture | Factory-install only | Minimal; nearly invisible | New window orders requiring maximum discretion | High (factory only) |
With a clearer picture of the vent types available, the next step is understanding when you're actually required to fit them. Building regulations have specific rules about ventilation in replacement windows, and getting this wrong can cause compliance headaches down the line.
Replacing your old windows with shiny new UPVC double glazing? Before you sign off on that quote, there's one question you need to answer: do your new windows need trickle vents? The answer isn't always obvious, and getting it wrong can leave you on the wrong side of Building Regulations.
The 2022 update to Approved Document F changed the game for trickle ventilation windows in England. Understanding these rules helps you avoid compliance issues and ensures your home stays healthy and well-ventilated.
Part F of the Building Regulations covers ventilation in dwellings. The core principle is straightforward: buildings must have adequate means of ventilation to protect occupant health. This means preventing mould growth, reducing indoor air pollution from cooking and cleaning products, and maintaining acceptable air quality throughout the home.
When you replace windows in an existing dwelling, the regulations require that ventilation must not be made worse as a result of the work. In practice, this creates a baseline: your new windows must provide at least the same level of background ventilation as the ones you're removing.
Here's where it gets interesting. Modern UPVC windows are significantly more airtight than older frames. Even if your original windows didn't have trickle vents, they likely allowed some air infiltration through gaps and imperfect seals. When you upgrade to tightly sealed modern glazing, you eliminate that passive airflow. To compensate, you'll typically need to add a window trickle vent to maintain compliant ventilation levels.
The regulations also specify practical requirements for how background ventilators should be installed. They should be positioned at least 1700mm above floor level to reduce cold draughts while remaining accessible for occupants to control. All ventilation must be controllable, either manually or automatically, and any automatic controls must include a manual override option.
So when exactly do you need to fit trickle vents in windows? The answer depends on your specific project. Let's walk through the decision logic.
One common misconception worth addressing: a night-vent position where the window locks slightly ajar is not an acceptable substitute for a trickle vent. The government guidance explicitly states this doesn't provide sufficiently secure background ventilation.
Similarly, you cannot sign a disclaimer promising to install ventilation later or stating you don't want it. For work to comply with Building Regulations, all requirements must be met in full at the time of installation. Purchasing an indemnity policy is also not a valid alternative.
When shopping for drip vents in windows or any background ventilator, you'll encounter references to BS EN 13141-1. What does this standard actually mean for you as a homeowner or contractor?
BS EN 13141-1:2019 is the British Standard for performance testing of ventilation components in residential buildings. When a trickle vent carries this certification, it means the product has been independently tested for several critical performance characteristics:
Why does this matter? A certified vent gives you confidence that it will actually deliver the ventilation performance claimed by the manufacturer. It also demonstrates the product can handle real-world conditions like driving rain without letting water into your home.
For compliance purposes, selecting a vent tested to BS EN 13141-1 provides documented evidence that your ventilation solution meets recognised performance standards. This can be important if your installation is ever inspected or if you need to demonstrate compliance for property sale or insurance purposes.
The equivalent area rating, often expressed in mm2, tells you how much airflow the vent provides. Different rooms have different requirements based on their size and use. Habitable rooms like bedrooms and living spaces typically need higher equivalent areas than utility spaces.
With the regulatory landscape clear, you might still have concerns about what these vents actually mean for your home's comfort and security. Let's tackle those common worries head-on.
You've heard the regulations, you understand the types, but now comes the real question: will fitting vents for windows make your home cold, draughty, or less secure? These concerns stop many homeowners from embracing background ventilation, even when they know it's required. Let's address each worry with facts rather than assumptions.
Picture this: it's a freezing January morning, and you're worried that slim slot above your window is letting all your expensive heating escape. It's a reasonable concern, but here's what actually happens inside a modern trickle vent.
Quality house window vents are engineered with baffled or labyrinthine internal channels. Instead of allowing cold air to stream directly into your room, these channels force incoming air through a series of turns and barriers. The result? Air enters slowly and diffuses gently rather than hitting you as a cold jet. You shouldn't feel a noticeable draught when walking past a properly installed vent.
The airflow rate through a trickle vent is intentionally low and passive. We're talking about background ventilation measured in litres per second, not the rush of air you'd get from an open window. The purpose is to maintain air quality continuously, not to cool your room. As ventilation experts note, any cooling of internal temperature in winter from a trickle vent is marginal when the vent is correctly sized and installed.
What about thermal performance? Adding a vent does introduce a small thermal bridge into your window frame. However, well-designed vents minimise this impact through insulated profiles and careful engineering. The trade-off is worth considering: a slight reduction in thermal efficiency versus the significant benefits of preventing condensation, mould, and poor air quality. For most homes, the ventilation benefits far outweigh the minimal heat loss.
If you do feel a cold draught near your windows with vents, the problem usually lies elsewhere. Incorrect sizing, poor installation leaving gaps around the vent housing, or a damaged product can all cause issues that wouldn't occur with a properly fitted unit.
Security is a valid concern for any opening in your home. But here's the reality: trickle vent apertures are simply too small to allow hand or tool access. The slot dimensions are designed for airflow, not entry. You couldn't fit your fingers through, let alone a hand or any tool that could manipulate your window locks.
Unlike the night-vent position where your window sits slightly ajar and remains vulnerable to being forced open, a trickle vent keeps your window fully closed and locked. The locking mechanism remains completely intact and engaged. Your window is just as secure with the vent open as it would be with a trickle vent blanking plate covering the slot.
Most modern vents include a closeable slider mechanism. When you don't need ventilation, perhaps during a storm or when you're away for extended periods, you can simply slide the vent closed. This gives you complete control without compromising security at any point.
What about driving rain? If there's an opening in your window frame, surely water can get in? This is where quality engineering makes all the difference.
Well-designed trickle vents use internal baffles and downward-angled channels to prevent rain from entering even in severe weather conditions. The external hood shields the opening from direct rainfall, while the internal pathway forces any water that does enter to drain back outside before it can reach your interior. Products tested to BS EN 13141-1 have been independently verified for water tightness under standardised test conditions.
Problems with water ingress typically indicate either a poor-quality product that lacks proper weather protection or an installation issue where the vent housing isn't seated correctly against the frame.
Before moving on, let's recap what we've covered:
With these concerns addressed, the practical question becomes: can your existing UPVC windows actually accommodate a retrofit vent? Not every frame is suitable, and knowing what to check before you buy saves time and frustration.
So you've decided your windows need better ventilation. Before ordering trickle window vents online, there's one crucial step: checking whether your existing UPVC frames can actually accommodate them. Not every window is retrofit-ready, and discovering compatibility issues after you've drilled into your frame is a headache nobody wants.
The good news? Most modern UPVC windows can accept retrofit vents with the right preparation. The key is knowing what to measure and what potential obstacles to look for. Let's walk through the assessment process step by step.
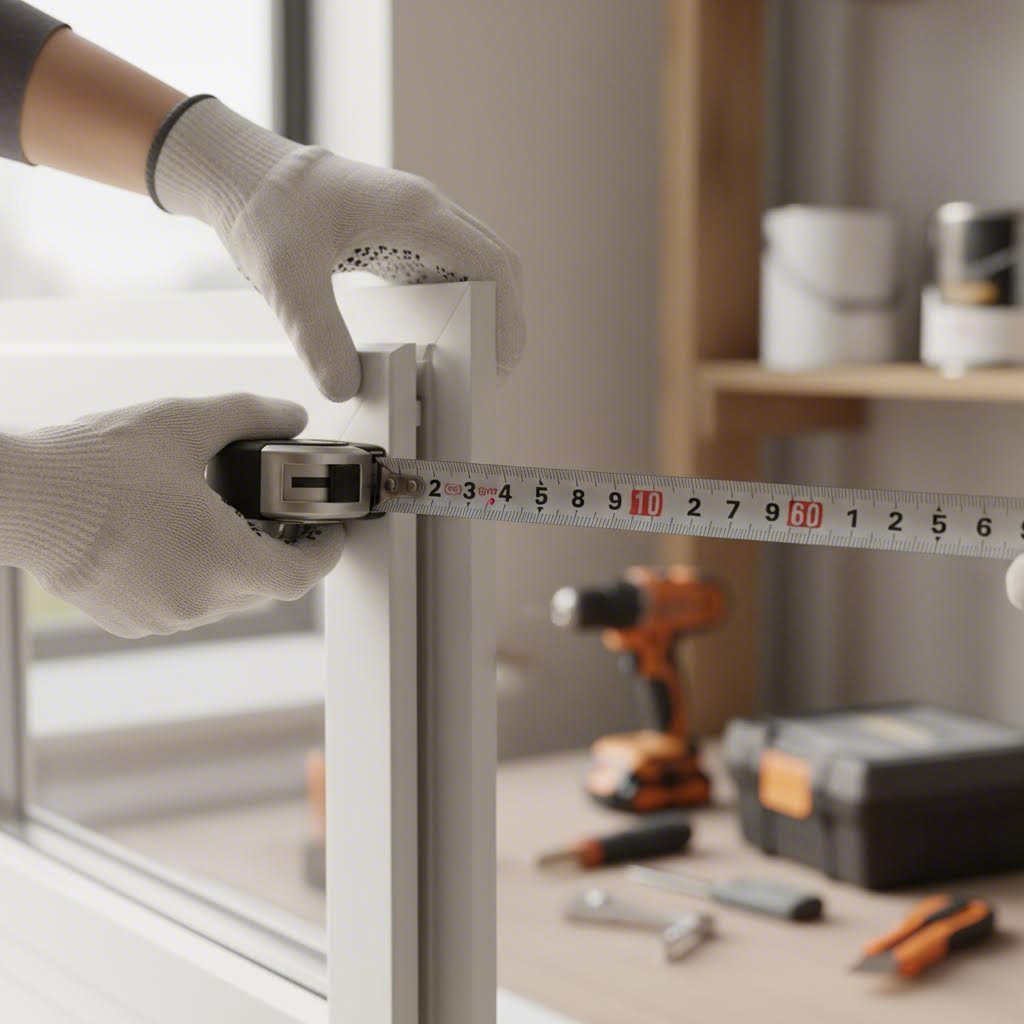
Grab a tape measure and head to your window. You'll be focusing on the head section, which is the horizontal top rail of the frame where trickle vents are typically installed. Three measurements matter most.
First, measure the head section width. This is the horizontal distance across the top of your frame, from one side to the other. Standard trickle vents come in various lengths, typically ranging from around 265mm to 700mm for the internal component. Your frame needs enough clear width to accommodate the vent you're planning to install, plus space for the fixing screws on either end. As a practical guide, fixing centres on common vents range from approximately 242mm on smaller units up to 658mm on larger models.
Second, measure the head section depth. This is the front-to-back dimension of the frame profile. Through-frame vents require drilling completely through this section, so you need sufficient depth for the vent components to sit properly on both the internal and external faces. Surface-mounted slot vents are more forgiving here since they sit on top of the frame rather than within it. Check manufacturer specifications for minimum frame depth requirements, as these vary between products.
Third, check the glazing bead clearance. The glazing bead is the strip that holds your sealed glass unit in place. You need enough space between the top of the glazing bead and the top of the frame to position your vent without interfering with the glass. If this gap is too narrow, you may be limited to smaller vent profiles or need to consider alternative installation positions.
Ready to assess your windows properly? Work through this checklist before committing to a purchase:
The blanking plate scenario is more common than you might think. Window manufacturers often include pre-cut slots as standard, fitting blanking plates when the original specification didn't require active ventilation. Converting these to working windows vents is a simple swap that requires no drilling at all.
DIY installation of surface-mounted slot vents is achievable for most confident homeowners with basic tools. However, certain situations warrant professional assessment:
A qualified window installer or double glazing repair specialist can assess your frames quickly and advise on the best approach. The cost of professional assessment is usually modest and can save you from expensive mistakes.
Once you've confirmed your frames are suitable, the next consideration is cost. Understanding what you'll pay for products and installation helps you budget realistically and choose the right option for your situation.
You've confirmed your frames are compatible. Now comes the question every homeowner asks: how much will this actually cost? Whether you're fitting a single vent to tackle condensation in a bathroom or equipping an entire house with double glazed windows with ventilation, understanding the cost landscape helps you budget sensibly and avoid overpaying.
Trickle vent pricing varies considerably depending on the type, size, finish, and airflow rating you choose. Here's how the market typically breaks down.
At the entry level, basic surface-mounted slot vents represent the most affordable option. These units sit on top of your existing frame and require only drilling rather than precision cutting. Browsing current UK retailers, you'll find standard white slot vents in the 260mm to 300mm range starting from around £5 to £7 per unit. Multipacks offer better value, with five-packs of 300mm or 400mm vents typically priced between £14 and £16.
Mid-range options include longer vents with higher equivalent area ratings and colour-matched finishes. Anthracite grey, brown, and black variants cost slightly more than standard white, usually adding £1 to £2 per unit. Vents in the 400mm to 410mm range with higher airflow capacity typically fall between £6 and £8 individually.
Premium products command higher prices for several reasons. Branded through-frame vents from established manufacturers often cost £10 to £17 per unit. These products typically offer superior weather performance, acoustic properties, and longer warranties. Colour-matched dual-finish vents, where the internal and external faces differ to suit your decor, also sit at the higher end of the price spectrum.
What drives these price differences? Several factors come into play:
The installation route you choose can significantly affect your total spend. Let's compare the two approaches.
For DIY installation, your costs are essentially the vent units themselves plus any tools you don't already own. Surface-mounted slot vents require basic equipment: a drill, appropriate drill bits, a screwdriver, a pencil, and a tape measure. If your frame contains steel reinforcement, you'll need a TCT drill bit, which adds a few pounds to your toolkit. Most homeowners already have these basics, making DIY retrofit genuinely affordable.
The installation process itself takes under an hour per window for surface-mounted vents. You're looking at material costs of £15 to £50 per vent depending on your product choice, with minimal additional expense if you already have the tools.
Professional installation changes the equation. Tradespeople typically charge for both labour and the vent unit, with total costs ranging from £80 to £150 per window vents house installation. This premium covers expertise, insurance, and the guarantee that the work meets Building Regulations. For through-frame vents requiring precision cutting, professional installation is often the sensible choice unless you're experienced with UPVC fabrication.
When does professional installation make sense? Consider it if:
Here's a decision many homeowners face: should you retrofit vents to existing windows or replace the windows entirely with units that have vents factory-fitted? The answer usually comes down to frame condition and overall project scope.
If your UPVC windows are otherwise in good condition, with intact seals, functioning hardware, and no visible damage, retrofitting is almost always the more cost-effective route. You're spending tens of pounds per window rather than hundreds. The disruption is minimal, typically requiring no more than an hour per window with no mess or redecoration needed.
Full window replacement makes sense when your existing frames are failing anyway. Condensation between the glass panes, draughty seals, broken locks, or visible frame damage all suggest the windows have reached the end of their useful life. In these cases, ordering new double glazed windows with ventilation built in delivers better long-term value than patching up failing units.
An alternative to trickle vents worth mentioning: some homeowners consider whole-house mechanical ventilation systems like PIV (Positive Input Ventilation) units. These loft-mounted systems cost significantly more, typically £300 to £350 for the unit alone plus installation, but provide whole-house ventilation without modifying individual windows. They're worth considering for properties with severe condensation issues or where window modification isn't practical.
| Option | Typical Cost Driver | Skill Level Required | Disruption Level | Best For |
|---|---|---|---|---|
| DIY Retrofit (Surface-Mounted) | Vent unit cost only; basic tools | Beginner to intermediate | Low; under one hour per window | Budget-conscious homeowners with sound frames |
| Professional Retrofit | Labour plus unit; typically £80-£150 per window | None required from homeowner | Low to moderate | Through-frame vents; steel-reinforced frames; multiple windows |
| New Windows with Vents Pre-Installed | Full window replacement cost | None required from homeowner | High; full installation day | Failing windows needing replacement anyway |
| Whole-House PIV System | Unit cost £300+ plus installation | Professional installation essential | Moderate; loft access required | Severe condensation; listed buildings; window modification not viable |
With costs understood, the final piece of the puzzle is keeping your vents working effectively over the long term. Proper maintenance extends their lifespan and ensures they continue delivering the ventilation your home needs.

You've invested in proper ventilation for your home. But when did you last actually check those vents are still working? Trickle vents for windows are easy to forget about once installed. They sit quietly at the top of your frames, doing their job without demanding attention. Yet like any component exposed to the elements, they need occasional care to keep performing well.
The good news is that maintenance takes minutes, not hours. A little attention each year prevents the kind of failures that lead to blocked airflow, condensation problems, and eventually costly replacements. Let's look at what's involved in keeping your ventilated window system in top condition.
Here's something reassuring: quality trickle vents are designed to last the lifetime of your window frame when properly maintained. We're talking decades of reliable service, not years. The vent housing itself is typically made from UV-stabilised plastic or powder-coated aluminium, materials chosen specifically for their durability in exterior applications.
That said, certain factors can shorten a vent's working life. UV exposure gradually degrades plastic components, particularly on south-facing windows that receive intense sunlight year-round. Over time, you might notice the housing becoming brittle or discoloured. The slider mechanism is especially vulnerable since it's the moving part that sees the most wear.
Paint is another common culprit. After redecorating window frames, overspray can work its way into the vent slot and gum up the slider track. What starts as a slightly stiff mechanism becomes completely seized if left unaddressed. Similarly, accumulated debris from dust, pollen, and airborne particles gradually restricts airflow and can prevent the vent from closing properly.
Industry data suggests that while double-glazed units typically last 20 to 35 years, trickle vents often need replacement after 5 to 10 years if maintenance is neglected. However, with regular care, there's no reason your vents shouldn't match the lifespan of the windows themselves.
Think of your air vents for double glazed windows as you would any other moving part in your home. A few minutes of attention prevents hours of frustration later. Here's a practical maintenance routine you can follow:
How often should you do this? For most homes, a thorough check twice a year is sufficient. Many homeowners find it convenient to combine vent maintenance with their regular window cleaning routine. Properties in urban areas with higher pollution levels, or homes surrounded by trees, may benefit from more frequent attention.
Even with diligent maintenance, vents eventually wear out. Knowing when repair gives way to replacement saves you from persisting with a component that's no longer doing its job. Watch for these warning signs:
Cracked or broken housing is the most obvious indicator. Plastic components become brittle with age and UV exposure. If you notice cracks in the vent body, particularly around the screw fixings or slider track, the structural integrity is compromised. A cracked housing can let in rain and draughts regardless of the slider position.
A seized or broken slider mechanism means you've lost control over your ventilation. If the slider won't move at all, or if it's snapped off entirely, the vent can no longer be adjusted. Some homeowners live with vents stuck in the open position, but this removes your ability to close them during storms or extreme cold.
Visible gaps in the weather seal indicate the vent is no longer sitting flush against your frame. This can happen if the housing has warped, if fixing screws have loosened, or if the original installation was poor. Gaps allow water ingress and uncontrolled draughts, defeating the purpose of having a controllable vent.
Finally, consider whether you have a blanking plate that was never converted to an active vent. Many UPVC windows ship with pre-cut ventilation slots covered by blank plates. If your home has condensation issues and you discover these unused slots, fitting active vent units is a straightforward upgrade that requires no drilling.
The replacement process itself is typically simple, provided your frame slot matches standard dimensions. Most retrofit vents are designed to fit common slot sizes, so finding a compatible replacement shouldn't be difficult. Remove the old unit by unscrewing the internal and external components, clean out the slot, and fit the new vent in its place. The whole job takes under thirty minutes per window.
With your vents maintained and working properly, the final step is knowing how to choose the right product when replacement or new installation becomes necessary. Understanding what to look for ensures you get a vent that performs well and lasts.
You've covered a lot of ground: vent types, regulations, installation checks, costs, and maintenance. Now it's time to pull everything together into a practical decision-making framework. Whether you're a homeowner tackling a single window or a contractor specifying vents for an entire development, knowing exactly what to look for simplifies the selection process considerably.
Selecting the right vent isn't complicated once you know the key criteria. Think of it as matching your specific requirements against the product options available. Here's what to consider:
Getting these criteria right upfront saves you from ordering the wrong product or discovering compatibility issues mid-installation.
For a single window retrofit, your local hardware store or online retailer will likely have what you need. But what if you're working on something larger? New builds, multi-property retrofit programmes, or OEM integration into window manufacturing all benefit from a different sourcing approach.
Going direct to a specialist manufacturer offers several advantages. Quality consistency improves when products come from a single controlled production line rather than being aggregated from multiple sources. Customisation becomes practical, whether that's specific colour matching, bespoke sizing, or modified airflow ratings. And for volume orders, manufacturer-direct pricing typically undercuts retail channels.
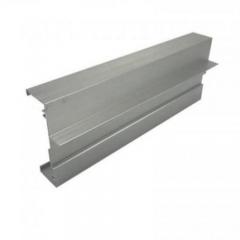
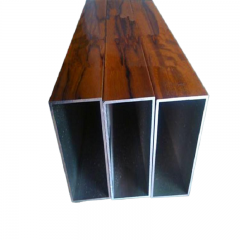
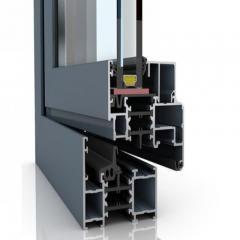
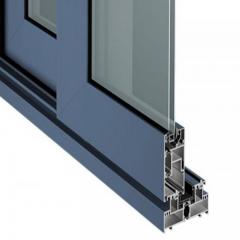
For homeowners, contractors, and developers seeking this kind of supply, particularly for seamless integration into both UPVC and aluminium frames, window trickle vents by Shengxin represent one example worth exploring. Their passive ventilation systems are designed for continuous, draft-free airflow while maintaining thermal comfort, backed by rigorous quality testing and comprehensive OEM capabilities. For large retrofit projects or new build specifications where reliable moisture control matters, manufacturer-direct sourcing like this delivers both product quality and supply chain simplicity.
Whatever your project scale, the principles remain the same: match the vent to your frame, verify compliance credentials, and source from suppliers who can deliver consistent quality. Get these fundamentals right, and your UPVC trickle vents will provide years of reliable, maintenance-free ventilation.
Under the 2022 Building Regulations Part F in England, replacement windows must provide equivalent or better ventilation than the originals. If your old windows had trickle vents, the new ones must too. Even without existing vents, upgrading from draughty single glazing to airtight UPVC typically requires adding trickle vents to compensate for lost passive airflow. Work certified through schemes like FENSA must demonstrate full compliance at installation.
Modern trickle vents are engineered with baffled internal channels that break up airflow, preventing cold air from entering as a direct stream. The airflow rate is intentionally low and passive, designed for background ventilation rather than cooling. While adding a vent introduces a minor thermal bridge, well-designed products minimise heat loss. Any noticeable draughts usually indicate incorrect sizing, poor installation, or a damaged unit rather than inherent design flaws.
Surface-mounted slot vents are DIY-friendly for most homeowners with basic tools. You'll need to measure your frame's head section width and depth, check for steel reinforcement, and confirm glazing bead clearance. Many UPVC windows already have pre-cut slots covered by blanking plates, making retrofit straightforward. However, through-frame vents requiring precision cutting are best left to professionals, especially if your frames contain steel reinforcement.
Basic surface-mounted slot vents start from around £5 to £7 each, with multipacks offering better value. Mid-range colour-matched options run £6 to £8, while premium through-frame vents from established manufacturers cost £10 to £17 per unit. DIY installation adds minimal expense if you have basic tools. Professional installation typically ranges from £80 to £150 per window, covering labour, expertise, and Building Regulations compliance.
Quality trickle vents can last the lifetime of your window frame with proper care. Maintenance twice yearly is sufficient for most homes: operate the slider mechanism regularly, clear debris with a soft brush, check for paint overspray, and inspect external baffles for blockages. Signs requiring replacement include cracked housing, seized sliders, visible gaps in weather seals, or persistent water ingress. Replacement typically takes under thirty minutes per window.


 บริการออนไลน์
 0086 136 3563 2360
 sales@sxalu.com
 +86 136 3563 2360
 ไทย
ไทย English
 français
 Deutsch
 русский
 español
 português
 العربية
 Việt
Việt Українська